19 November 2023

Bird Photography Practical CTPS Woodbridge Island, Cape Town

Cape Town Photography Society (CTPS) Bird Photography Outing

Little Egret in Flight over the Diep River, Woodbridge Island

On Sunday morning, 19 November 2023, I went out with members of the Cape Town Photography Society (CTPS) to photograph some birds in flight / perched birds around the Diep River, Table Bay Nature Reserve, Woodbridge Island area(s).

I presented the Birds in Flight / Perched Bird Photography theory session to a substantial group of CTPS enthusiast bird photography members in Pinelands during March 2023. Since then we tried to find a suitable Saturday / Sunday morning for the practical session. Only now in November 2023 we anticipated that the weather would provide more favourable conditions in terms of some sun, less wind and improved light conditions. Unfortunately on our outing day it was not the most conducive birding day around here. It looked very much like June / July in Cape Town.
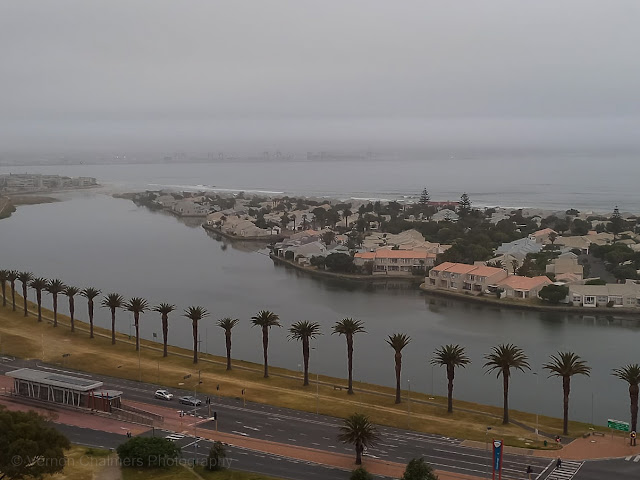
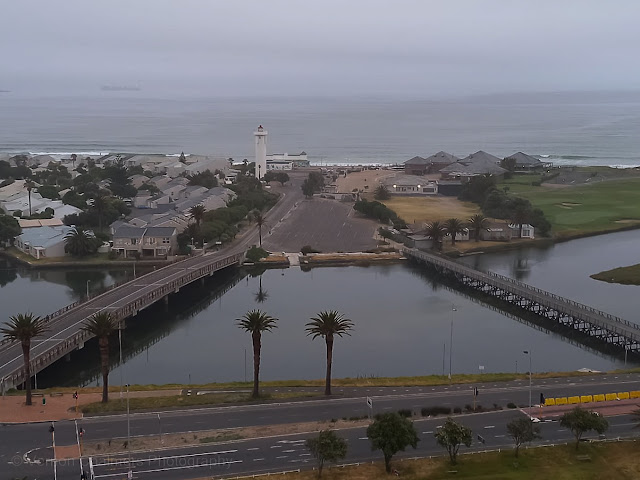
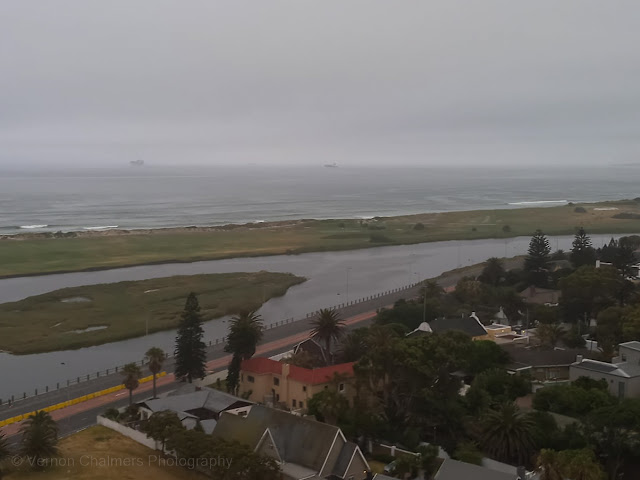
More than an anomaly for November weather conditions at Woodbridge Island

Miserable Birding Conditions Woodbridge Island and Diep River 1
Woodbridge Island Towards Cape Town over Woodbridge Island

Miserable Birding Conditions Woodbridge Island and Diep River 2
Milnerton Lighthouse / Woodbridge Island

Miserable Birding Conditions Woodbridge Island and Diep River 3
Woodbridge Island, Small Island Surrounded By The Diep River

Miserable Birding Conditions Woodbridge Island and Diep River 4
Woodbridge Island / Diep River Towards Bloubergstrand

Not quite the birds / birds in flight weather conditions at Woodbridge Island we had in mind this particular November Sunday morning. Nevertheless, quite a few members arrived at 07:30 and we set-out to see what we could capture and learn around the Diep River, Table Bay Nature Reserve, Woodbridge Island. I also used the opportunity to test the Canon EF 100-400mm f/4.5 – 5.6L IS II USM lens paired with one of my Canon EOS 70D bodies. Normally in these conditions (and / or otherwise for birds in flight) I would use my Canon 7D Mark II paired with the EF 400mm f/5.6L USM lens.

Fortunately these conditions provide excellent learning opportunities from so many different perspectives. I'm glad we persuaded and in my opinion most of the photographers will have learned a great deal from the area, their gear and the conditions 

This morning became a learning experience for many members trying out their new camera gear and also became an opportunity in shooting in less ideal situations. We took a long hike into the Table Bay Nature Reserve and we encountered 10 – 15 species in-flight an perched birds.

One mistake I made was not to adjust the variable aperture lens to its full 400mm after I captured the above little egret just above the Diep River at 260mm. The consequence was that the rest of my shots were all captured at 260mm. The 40mm focal length would made a significant difference in many of my other shots. I generally only shoot around here with my prime 400mm lens and forgot to adjust the focal length back to 400mm.

I thoroughly enjoyed my morning with the CTPS-members and we will repeat this exercise in January 2024. I really want to expose the club members to the good early morning light quality we mostly do have here in summer and trust our next outing will provide just that.

A Sunday morning well-spent with a group of great people / Cape Town photographers.

Canon Equipment / setting I used:
  • Canon EOS 70D APS-C Body
  • Canon EF 100-400mm f/4-5.6L USM II lens
  • Manual mode @ 360MM
  • Aperture: f/5.6
  • Auto-ISO: 320 – 800
  • Shutter Speed: 1/2500s
  • Lens AF on.Lens IS turn off
  • Zone AF / 7fps / Handheld

Some of the Birds of Woodbridge Island Photographed 
  • Little Egret in Flight over the Diep River, Woodbridge Island
  • Grey heron towards the back of the Table Bay Nature Reserve
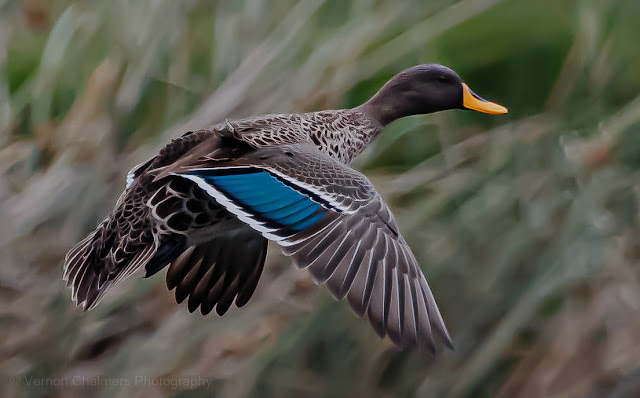
  • Yellow-Billed Duck against the Reeds Table Bay Nature Reserve
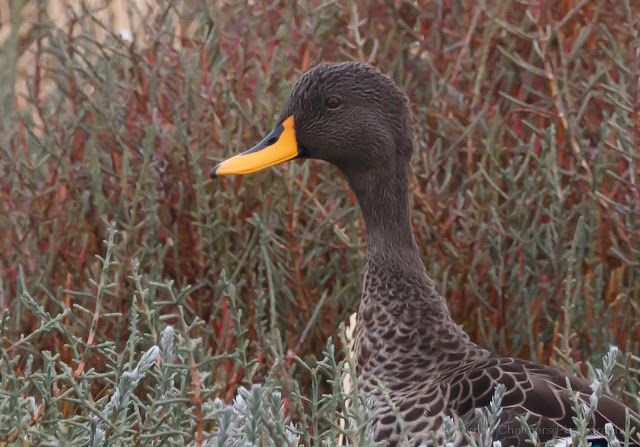
  • Yellow-Billed Duck Portrait in the Table Bay Nature Reserve
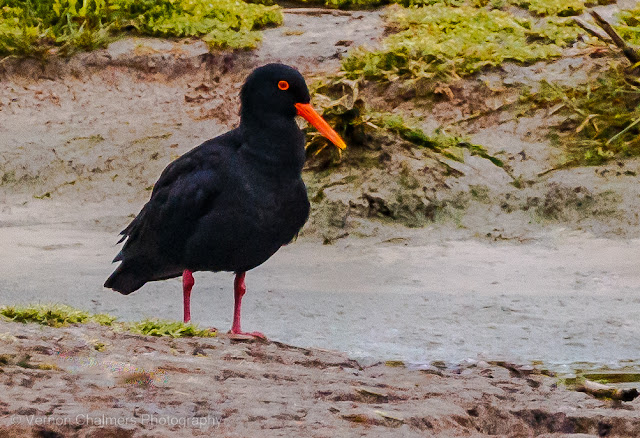
  • Black Oystercatcher - on the small island adjacent to Woodbridge Island

Grey Heron in the Table Bay Nature Reserve

Yellow-Billed Duck against the Reeds
Yellow-Billed Duck against the Reeds - Over the Diep River

Yellow-Billed Duck Portrait
Yellow-Billed Duck Portrait - Table Bay Nature Reservr

Black OysterCatcher
Black OysterCatcher - Small Island, Woodbridge Island

Vernon Chalmers Photography Training Intaka Island | Kirstenbosch Garden | Woodbridge Island

How to Choose a New Camera

Choosing The Right Camera For Your Needs

DSLR vs. Mirrorless Camera

How to Choose a New Camera

“For me, the camera is a sketch book, an instrument of intuition and spontaneity.
― Henri Cartier-Bresson

How to Choose a New Camera

"Choosing a new camera can be an exciting but sometimes overwhelming process, as there are many options available with varying features and specifications. Here's a step-by-step guide to help you make an informed decision:

1. Define Your Purpose:Consider Your Goals
  • Determine what you want to achieve with the camera. Are you interested in photography, videography, or both? Will you be shooting portraits, landscapes, action, or something else?

2. Set a Budget:Establish a Range
  • Cameras come in various price ranges. Determine how much you're willing to spend on both the camera body and any additional lenses or accessories.

3. Camera Type
  • Digital or Film: Decide whether you want a digital or film camera. Digital is more common nowadays due to its convenience and flexibility.
  • Interchangeable Lens vs. Point-and-Shoot: Interchangeable lens cameras (DSLRs or mirrorless) provide more versatility, while point-and-shoot cameras are simpler and more portable.

4. Sensor Size:Full-frame vs. Crop Sensor
  • Full-frame sensors generally provide better image quality but can be more expensive. Crop sensors are smaller but can still produce excellent results.

5. Resolution:Megapixels
  • While higher megapixels can offer more detail, they're not the only factor in image quality. Don't prioritize megapixels over other features.

6. Low Light Performance
  • ISO Range: Consider the camera's ISO range. A wider range is beneficial for low-light conditions.

7. Autofocus System:Speed and Accuracy
  • Look for a camera with a fast and accurate autofocus system, especially if you plan on capturing fast-moving subjects.

8. Video Capabilities
  • Resolution and Frame Rates: If you're into videography, check the camera's video capabilities, including resolution (1080p, 4K) and frame rates.

9. Size and Weight
  • Portability: Consider how portable and easy to carry the camera is, especially if you plan on traveling frequently.

10. Brand and Ecosystem
  • Lens Availability: Check the availability of lenses and accessories for the camera brand. Some brands have more extensive ecosystems than others.

11. User Interface
  • Ease of Use: Consider the camera's user interface. Some cameras may have more intuitive controls and menus than others.

12. Reviews and Recommendations
  • Research: Read reviews from both experts and user reviews to get a sense of real-world performance and user experiences.

13. Try Before You Buy
  • Hands-On Experience: If possible, go to a store and handle the camera. Check its ergonomics, button placement, and overall feel.

14. Future-Proofing
  • Consider the Future: Think about your future needs and whether the camera can grow with you as you advance in your photography or videography journey.

15. Warranty and Support
  • Check Warranty: Look into the warranty and support offered by the manufacturer.

Remember, the "best" camera depends on your specific needs and preferences. Take your time, do thorough research, and choose a camera that aligns with your goals and budget." (Source: ChatGPT 2023)

DSLR vs. Mirrorless Camera

"The choice between a DSLR (Digital Single-Lens Reflex) camera and a mirrorless camera depends on your specific needs, preferences, and the type of photography or videography you're interested in. Here are some key differences between DSLR and mirrorless cameras:

1. Mirror Mechanism
  • DSLR: Utilizes a mirror mechanism. Light passes through the lens, reflects off a mirror, and then reaches an optical viewfinder, allowing you to see exactly what the lens sees.
  • Mirrorless: Does not have a mirror mechanism. Light passes directly to the image sensor, and the preview is displayed on an electronic viewfinder (EVF) or the camera's LCD screen.

2. Size and Weight
  • DSLR: Generally larger and heavier due to the mirror and prism system.
  • Mirrorless: More compact and lightweight since they lack the mirror and optical viewfinder.

3. Autofocus
  • DSLR: Traditionally relied on phase-detection autofocus through the optical viewfinder. Live view and video modes often use slower contrast-detection autofocus.
  • Mirrorless: Uses contrast-detection or phase-detection pixels directly on the image sensor. Many modern mirrorless cameras offer fast and accurate autofocus, sometimes even outperforming DSLRs.

4. Viewfinder
  • DSLR: Optical viewfinder provides a direct optical view through the lens. Some DSLRs also have Live View mode using the LCD screen.
  • Mirrorless: Uses either an electronic viewfinder (EVF) or the LCD screen to display a digital preview. EVFs have improved over time, offering real-time exposure adjustments and other useful information.

5. Battery Life
  • DSLR: Typically has longer battery life since power is not continuously required for an electronic viewfinder.
  • Mirrorless: May have shorter battery life due to the constant use of electronic components.

6. Lens Compatibility
  • DSLR: Often has a longer history of lens development and a wider selection of native lenses. However, older lenses may not be fully compatible with newer bodies.
  • Mirrorless: May have a shorter history but is catching up quickly. Some mirrorless cameras can use DSLR lenses with adapters, but native mirrorless lenses are becoming more prevalent.

7. Continuous Shooting Speed
  • DSLR Can have high burst rates but may experience blackout between shots due to the mirror mechanism.
  • Mirrorless: Generally offers faster and more silent continuous shooting with no blackout, making them ideal for capturing fast action.

8. Video Capabilities
  • DSLR: Capable of recording video, but autofocus in video mode may be slower or less advanced compared to mirrorless cameras.
  • Mirrorless: Often designed with video in mind, offering advanced autofocus during video recording and, in some cases, superior video features.

9. Durability and Weather Sealing
  • DSLR: Traditionally known for robust build quality and better resistance to environmental conditions.
  • Mirrorless: Increasingly designed with weather sealing and durability, but this can vary by model.

10. Cost
  • DSLR Can be more budget-friendly, especially for entry-level models.
  • Mirrorless: Prices vary, but high-end mirrorless cameras can be comparable to or more expensive than DSLRs.

In recent years, mirrorless cameras have gained popularity and technological advancements, narrowing the gap with DSLRs. The choice ultimately depends on your priorities, whether it's size, specific features, lens compatibility, or budget constraints. Both types can deliver excellent results, so it's worth considering your individual needs and preferences before making a decision." (Source ChatGPT 2023)

Images Source: Pixabay (Open Source)

Intaka Island Google Map | Directions

Intaka Island, Cape Town, Map and Directions

Birds | Birds in Flight Photography Intaka Island

Intaka Island, Cape Town, Map and Directions
African Sacred Ibis at Intaka Island : Copyright Vernon Chalmers

Bird / Birds in flight Intaka Island | Century City, Cape Town
We regularly facilitate the Birds in Flight, Landscape and Macro Photography Workshops in the Eco Centre at Intaka Island, Cape Town. From time to time I facilitate one-one training around (inside the hides) at Intaka Island. 

Intaka Island Address
1 Century City Drive
Century City
Cape Town

Tel: (021) 552 6889

Intaka Island Website

Intaka Island Google Map / Directions
The embedded Google Map should provide information / direction detail when viewed on Desktop and Mobile devices.


Intaka Island, Cape Town Public Location / Information Brochure Front

What do do at Intaka Island?

Intaka Island, Cape Town Public Location / Information Brochure Front
Intaka Island, Cape Town Brochure (Front)

Intaka Island, Cape Town Public Location / Information Brochure Back

Intaka Island, Cape Town Public Location / Information Brochure Back
Intaka Island, Cape Town Brochure (Back)

Intaka Island, Cape Town
"Intaka Island is a unique urban wetland and bird sanctuary located in Century City, Cape Town, South Africa. Century City is a mixed-use development that includes residential, commercial, and recreational spaces. Intaka Island was created as a conservation area within this urban environment to provide a habitat for a variety of bird species and other wildlife.

Key features of Intaka Island, Cape Town include:

1. Bird Watching
The island is home to a diverse range of bird species, making it a popular destination for birdwatchers. The island has several bird hides and walking trails where visitors can observe and enjoy the avian residents.

2. Eco-Centre
Intaka Island features an Eco-Centre, which serves as an educational facility. It provides information about the flora and fauna of the wetland, as well as environmental conservation initiatives.

3. Boardwalks and Trails
Visitors can explore the island through a network of boardwalks and trails that meander through the wetland. These pathways offer a peaceful and scenic environment for nature enthusiasts.

4. Canoe Trails
The island has canoe trails that allow visitors to paddle through the waterways, providing a unique perspective of the wetland and its wildlife.

5. Conservation
The primary purpose of Intaka Island is to conserve and protect the natural environment within an urban setting. The wetland plays a crucial role in supporting biodiversity and maintaining a balanced ecosystem.

Intaka Island is an example of how urban planning can incorporate green spaces and wildlife conservation into the fabric of a city. It provides a welcome escape for residents and visitors alike, allowing them to connect with nature without having to venture far from the city center." (Source: ChatGPT 2023)

Canon Camera Bird Photography Practical Training Intaka Island Photography Training

Vernon Chalmers Photography Private Training Studio Google Map / Directions

Woodbridge Island (Birds in Flight Photography) Google Map / Directions

Bird Life at Intaka Island Cape Town

01 November 2023

Table Bay Nature Reserve: Hidden Urban Treasure

 Table Bay Nature Reserve / Woodbridge Island

Entrance to the Table Bay Nature Reserve
Entrance to the Table Bay Nature Reserve, Woodbridge Island Cape Town

Table Bay Nature Reserve / Wood bridge Island
A short hike from Woodbridge Island, opposite Milnerton High School, is the entrance to the Milnerton Lagoon section of the Table Bay Nature Reserve conservation Biodiversity Network. A relatively small wetlands area, but part of the much wider geographical nature conservation zone covering the Rietvlei Wetlands, Milnerton Lagoon, Milnerton Beach, Milnerton Racecourse, Zoarvlei Wetlands, Diep River and the Parklands Fynbos Corridor.

I frequently hike the Milnerton Lagoon / Diep River area in the hope of spotting some of the various bird species around the roadside of the Milnerton Lagoon, the Diep River and the tiny island (not Woodbridge Island) where I regularly photograph egyptian geese, grey herons, pied kingfishers and spoonbills.


I've spotted a lonesome malachite kingfisher flying past a few times, but I'm still unable to discover his perching whereabouts - or to get a good in flight capture. On a sunny morning there are many red-knobbed coots scooting down the river.

Pied Kingfisher : Table Bay Nature Reserve, Woodbridge Island, Cape Town

Smaller Birds
Various smaller birds like the weaver and waxbill chirp and hop impatiently through the reeds. Many of the larger birds also land and feed on the Milnerton golf course side of the Diep River. 

On any given day there will be at least one Pied kingfisher flying, diving and / or perched. Personally, my favorite small bird to watch and photograph.

During summer many sandwich and swift terns carry out their spectacular dives and turns out past the pump station into the main reserve area. 

Malachite kingfisher
Over the last couple months I've also captured the elusive malachite kingfisher perched / (and eventually in flight) in the reserve and on the wooden bridge.


More information on the Woodbridge Island, Cape Town Local Bird Species

Table Bay Nature Reserve: Hidden Urban Treasure
Karoo Prinea : Table Bay Nature Reserve, Woodbridge Island Cape Town

Entrance to the Table Bay Nature Reserve (Milnerton Beach / Milnerton Lagoon / Diep River) is free and the images below are captured from about a 10 - 15 minutes walk from Milnerton Lagoon / Woodbridge Island through the Diep River entrance.

There are some amazing views of the Diep River, the prominent Milnerton Lighthouse on Woodbridge Island and our majestic Table Mountain. 

On the other side of the Diep River are the lushes greens of the Milnerton Golf Course - on a quite morning you will hear the regular 'ping' of golf balls being driven down the well-kept fairways.

Snapshots with Canon EOS 6D / EF 70-300mm f/4-5.6L IS USM lens.

Table Bay Nature Reserve Management
The Table Bay Nature Reserve is managed by the City of Cape Town and consists of seven parts: Rietvlei Wetlands, Milnerton Lagoon, Milnerton Beach, Milnerton Racecourse, Zoarvlei Wetlands, Diep River, and the Parklands Fynbos Corridor.

This approximately 880-hectare reserve comprises a variety of permanent and seasonal wetlands, and is surrounded by Cape Flats dune strandveld and Cape Flats sand fynbos vegetation.

The Rietvlei Wetland is in the floodplain of the Diep River between Milnerton and Table View. The river drains into Table Bay via the Milnerton Lagoon. The wetland offers a variety of habitats including a permanent freshwater lake, shallow marshes that flood in winter, reed beds, a river, and an estuarine lagoon with salt marshes that is open to the sea. A strip of coastal dunes links the reserve to Table Bay.

Bird watching facilities, including boardwalks and two bird hides, are provided in the Rietvlei Section. The “Old Friends Hide” looks out over the seasonal pans while the “Sunset Hide” looks out over the southern deep water lake. (Source: Cape Bird Club)

© Vernon Chalmers Photography

(Click to Enlarge)
Table Bay Nature Reserve - Diep River View

Table Bay Nature Reserve - Table Mountain View

Links to more Table Bay Nature Reserve information

Table Bay Nature Reserve - City of Cape Town

Table Bay Nature Reserve - Cape Bird Club

Table Bay Nature Reserve - Cape Bird Club

Bird Watching in the Table Bay Nature Reserve
Bird Watching in the Table Table Bay Nature Reserve

Table Bay Nature Reserve - Wikipedia

Table Bay Nature Reserve - Cape Town Green Map

Table Bay Nature Reserve – Responsible Tourism


Accommodation near Table Bay Nature Reserve

African Spoonbill Table Bay Nature Reserve Woodbridge Island
African Spoonbill Table Bay Nature Reserve, Woodbridge Island

Directions / Map to the Diep River Section of the Table Bay Nature Reserve, Cape Town
Entrance to the Table Bay Nature Reserve is on the Diep River side of the crossing of Broad Road and West Coast Road. My recommendation if you coming by car is to park on Woodbridge Island and walk over the main bridge, past the old wooden bridge and keep along the Diep River, past the pump station rondawel and enter to the left where you see the Table Bay Nature Reserve sign board (at the traffic lights).

Directions / Map to the Diep River Section of the Table Bay Nature Reserve, Cape Town


Close-Up Photography : Table Bay Nature Reserve, Woodbridge Island
Close-Up Photography : Table Bay Nature Reserve, Woodbridge Island Cape Town

More about the Table Bay Nature Reserve (Woodbridge Island)
"The Table Bay Nature Reserve is an 880-hectare (2,200-acre) nature reserve in Milnerton, Western Cape, South Africa. It consists of several smaller constituent reserves including Rietvlei Wetland Reserve, Diep River Fynbos Corridor, Zoarvlei Wetlands, Milnerton Racecourse Nature Reserve, and Milnerton Lagoon, as well as surrounding protected areas. These adjacent reserves were amalgamated on 27 June 2012, in order to improve the biodiversity management in the built-up area. It is managed by the City of Cape Town’s Environmental Resource Management Department, with offices at Rietvlei.

The Table Bay Nature Reserve consists of seven parts: Rietvlei Wetlands, Milnerton Lagoon, Milnerton Beach, Milnerton Racecourse, Zoarvlei Wetlands, Diep River, and the Parklands Fynbos Corridor. This 880-hectare reserve comprises a variety of permanent and seasonal wetlands, and is surrounded by Cape Flats dune strandveld and Cape Flats sand fynbos vegetation. The Rietvlei Wetland is in the floodplain of the Diep River between Milnerton and Table View that drains into Table Bay via the Milnerton Lagoon.

The broader reserve offers a range of educational, recreational opportunities. You can watch birds from board walks and enjoy two bird hides at the Rietvlei Section (Table View), braai and picnic on Rietvlei’s shoreline, bring school groups for environmental education programmes, paddle and canoe at the Milnerton Lagoon and Rietvlei Sections, sail, ski and powerboat at Rietvlei, and fish at selected sites.

The Table Bay Nature Reserve, which includes Milnerton Lagoon, Milnerton Beach, and Milnerton Racecourse, is part of Woodbridge Island." (Source: Google Bing AI 2023)

How to Manage a Photography Business

Photography Business and Management Essentials

How to Manage a Photography Business

What makes photography a strange invention is that its primary raw materials are time and light.”
— John Berger

How to Manage a Photography Business
"Managing a photography business involves a combination of artistic skill, business acumen, and effective organization. Here are some key steps and considerations to help you successfully manage your photography business:

1. Business Plan
  • Define Your Niche: Identify your target market and the type of photography services you want to offer (e.g., portrait, wedding, commercial, etc.).
  • Set Goals: Outline short-term and long-term goals for your business.

2. Legalities and Finances
  • Legal Structure: Choose a legal structure for your business (sole proprietorship, LLC, etc.).
  • Permits and Licenses: Research and obtain any necessary permits and licenses.
  • Accounting: Keep detailed financial records and consider hiring an accountant.

3. Marketing and Branding:Portfolio
  • Build a strong portfolio showcasing your best work.
  • Online Presence: Create a professional website and utilize social media to showcase your portfolio.
  • Networking: Attend events, collaborate with other professionals, and join relevant online communities.

4. Client Management:Contracts
  • Develop clear, comprehensive contracts for your clients.
  • Communication: Maintain open and effective communication with clients.
  • Customer Service: Provide excellent customer service to build positive relationships.

5. Workflow and Organization:Scheduling
  • Use a scheduling system to manage appointments and sessions.
  • File Management: Organize and back up your photos systematically.
  • Workflow Efficiency: Streamline your workflow to maximize productivity.

6. Equipment and Technology
  • Up-to-Date Gear: Invest in quality photography equipment and keep it up to date.
  • Software: Use efficient post-processing software for editing.
  • Online Platforms: Explore online platforms for proofing, delivery, and sales.

7. Pricing and Services
  • Pricing Strategy: Develop a pricing strategy that covers your costs and provides a profit.
  • Packages and Add-ons: Offer various packages and additional services.

8. Continuous Learning
  • Stay Updated: Keep up with industry trends, new technologies, and evolving techniques.
  • Skill Development: Continuously improve your photography skills.

9. Customer Feedback
  • Feedback System: Implement a feedback system to learn from client experiences.
  • Adapt and Improve: Use feedback to adapt and improve your services.

10. Insurance:Liability Insurance
  • Consider getting liability insurance to protect yourself and your clients.

11. Time Management
  • Prioritize Tasks: Effectively manage your time, prioritizing tasks based on deadlines and importance.

12. Adaptability:Adapt to Changes
  • Be adaptable to changes in the market, technology, or client expectations.

13. Collaborations and Partnerships
  • Collaborate: Explore collaborations with other businesses or photographers.
  • Partnerships: Consider forming partnerships for mutual benefit.

14. Education and Training
  • Workshops and Courses: Attend workshops or take courses to enhance your skills.
  • Mentorship: Seek mentorship from experienced photographers.

Remember, managing a photography business is a dynamic process, and staying flexible and responsive to changes will contribute to your long-term success." (Source: ChatGPT 2023)

Testing the Canon 500D 77mm Close-Up Lens Filter

Close-Up Photography: Testing the Canon 500D 77mm Close-Up Lens Filter
In an effort to reduce the minimum focus distance (MFD) of my 400mm lens (3.5 meter) I ordered a Canon 500D 77mm close-up lens filter. This is mainly to eliminate the carrying of a second body with macro lens when out in the field with the long lens (for Birds in Flight). The 400mm works well for close-up work from a distance, but I wanted a closer focusing option (with more magnification).

Canon 10-400mm Lens with Canon 500D 77mm Close-Up Lens Filter >>

Canon 500D 77mm Close-Up Lens Filter Challenges

With the close-up lens filter the MFD is now an effective 40 - 50mm (compared to 3.5 meter) - which brings some challenges (specific to the 400mm non-IS lens):

  • Narrow depth of field (require smaller apertures to counter this)
  • Best useful f/stops are now f/22 - f/32
  • Requires good light or flash
  • With no IS extra stability is required (tripod) / or faster shutter speed

What I like so far:

  • Autofocus works well in good light
  • Manual focus with flash works well on tripod
  • Satisfied with the extreme close-up image quality
  • Quality of the bokeh (blurred out of focus areas)

This specific combination (crop with 400mm lens) should work beter on a full frame body (as it is minus the 1.6 crop factor) with a 70-300mm lens (as recommended by Canon). There is no point in using the Canon 500D close-up lens filter on the EOS 6D / 400mm lens as I want to be able to use it in the field (Canon EOS 7D Mark II) without removing any lenses. But, I will test it later with my Canon EF 70-300mm f/4-5.6L IS USM lens on APS-C (EOS 70D) and Full Frame (Canon EOS 6D).

First three images: Handheld, outside in good light and AF with manual exposure settings as I would capture Birds in Flight - ISO during the outside light testing was limited to ISO 1600.

Last image: On tripod with Speedlite 430 EX II (bounced) flash: ISO 400 (Av Mode).

All images are uncropped and processed in Lightroom 6 with some exposure, contrast and a few other adjustments.

Body / Lens used: Canon EOS 7D Mark II / EF 400mm f/5.5L USM Lens f/32 / ISO 400 - 1600 1/250 - 1/5000s.


Location: Milnerton, Cape Town

What is an Extension Tube in Photography?

"An extension tube is a device used in photography to enable a camera lens to focus closer than its normal minimum focusing distance. It is a hollow tube that fits between the camera body and the lens, effectively increasing the distance between the lens and the camera's image sensor. This extension allows for closer focusing on the subject, making it appear larger in the frame.

Extension tubes come in various lengths, and they are typically used in macro photography or other situations where getting closer to the subject is essential. They don't contain any optical elements like lenses, so they don't affect the image quality in terms of optical aberrations or distortions. Instead, they alter the focusing range of the lens.

When using extension tubes, there are a few things to keep in mind:

Loss of Light: Since the extension tube increases the distance between the lens and the camera sensor, it reduces the amount of light reaching the sensor. This may require adjusting your exposure settings accordingly.

Autofocus Limitations: Some extension tubes may limit or disable autofocus functionality, depending on the camera and lens combination. Manual focusing is often used in macro photography, but it's something to be aware of.

Depth of Field: As you get closer to the subject, the depth of field becomes very shallow. It's important to carefully control your aperture to achieve the desired focus.

Increased Magnification: The primary purpose of extension tubes is to increase magnification. However, using longer tubes or stacking multiple tubes may result in a very narrow depth of field.

Extension tubes are a cost-effective way to experiment with macro photography without investing in dedicated macro lenses. They can be used with a variety of lenses, but the level of magnification and working distance will depend on the specific lens and tube combination." (Source: ChatGPT 2023)

(Click to Enlarge)
Testing the Canon 500D 77mm Close-Up Lens Filter
Canon 500D 77mm Close-Up Lens - Bee on Flower f/32 / ISO 3200

Close-Up Photography: Testing the Canon 500D 77mm Close-Up Lens Filter
Canon 500D 77mm Close-Up LensDaisy flower  (Handheld) f/32 / ISO 1600

Close-Up Photography: Testing the Canon 500D 77mm Close-Up Lens Filter
Small Daisy Flower (Handheld) f/32 / ISO 1600

Close-Up Photography: Testing the Canon 500D 77mm Close-Up Lens Filter
Canon 500D 77mm Close-Up LensTiny Grass Flower (Handheld) f/32  / ISO 1600

Close-Up Photography: Testing the Canon 500D 77mm Close-Up Lens Filter
Canon 500D 77mm Close-Up Lens Inside a Pincushion Flower  f/32 / ISO 400 (Speedlite Flash / Tripod

Photography In The Fog

 How to Capture Images in Foggy Conditions

Tips for Photography In The Fog 

Bird Photography In The Fog

In nature, everything has a job. The job of the fog is to beautify further the existing beauties!”
― Mehmet Mura

"Expecting nothing in front of me while bemoaning the fog - the cormorant appeared from absolutely nowhere. I changed my mind about (the) fog at that very moment.  Vernon Chalmers

Above Image Detail (Woodbridge Island, Cape Town)
  • Canon EOS 7D Mark II / EF 400mm f/5.6L USM (Prime) lens 
  • Manual Mode:  f/5.6 / 1/2500s / Auto-ISO 640 / Large-Zone AF / No IS (handheld)

Photographing Images in the Fog
Photographing in fog can create atmospheric and ethereal images, transforming familiar scenes into mysterious landscapes. Here are some tips to enhance your foggy photography:

1. Use a Tripod

  • Fog can reduce the amount of available light, requiring longer exposure times. A sturdy tripod will help you capture sharp images without camera shake.

2. Wide Aperture

  • Use a wide aperture (small f-number) to allow more light into your camera. This helps maintain faster shutter speeds, reducing the chance of motion blur.

3. Manual Focus:

  • Autofocus can struggle in thick fog. Switch to manual focus and use live view on your camera to ensure precise focusing, especially if you have subjects at varying distances.

4. Capture Silhouettes

  • Use the fog to create silhouettes of trees, buildings, or people. Position your subjects in front of a light source, and expose for the background to create striking contrasts.

5. Play with Composition

  • Experiment with composition to create a sense of depth. Include foreground elements like trees or rocks to add layers to your image, enhancing the feeling of distance and mystery.

6. Shoot in RAW

  • Foggy conditions can result in low contrast and muted colors. Shooting in RAW format gives you more flexibility during post-processing to adjust exposure, contrast, and color balance.

7. Look for Reflections

  • If there are bodies of water in the area, look for reflections in the water. The fog can add an extra layer of interest to reflective surfaces.

8. Experiment with Monochrome

  • Fog often reduces color saturation. Consider converting your images to black and white during post-processing to emphasize contrast and shapes.

9. Use a Lens Hood
  • Moisture from the fog can settle on your lens. Using a lens hood can help protect your lens from droplets and maintain image clarity.

10. Adjust White Balance

  • Fog can create a cool, blue cast in your photos. Experiment with your camera's white balance settings or adjust it in post-processing to achieve the desired color tone.

11. Capture Misty Landscapes

  • Look for scenes with rolling hills or mountains partially obscured by fog. This can create a dreamy and otherworldly atmosphere.

12. Capture Early Morning or Late Evening
  • Fog often occurs during the early morning or late evening when temperatures are cooler. These times can provide beautiful, soft light that complements the foggy conditions.

Remember, experimentation is key. Embrace the mysterious and moody nature of fog, and don't be afraid to try new techniques to capture its unique beauty. (Source: ChatGPT 2023)

Additional URL's for Improving Fog Photography

A Beginner's Guide to Fog Photography Dhavalilama

Birds in Flight in the Fog Handheld Vernon Chalmers Photography

Camera Settings for Capturing Early Morning Mist Canon Asia

Canon EOS 7D Mark II: Shooting In The Fog Vernon Chalmers Photography

Challenging Fog Photography 1X

Composing the Perfect Foggy Shot Tourism Hope

Everything You Need to Know to Capture the Mystery of Fog Picsart

Fog Photography: A Step-by-Step Guide Ripe Thinking

Fog and the Different Ways of Photographing It Learn Photography

Fog and Mist: Tips, Photoshop, and Beautiful Examples Loaded Landscapes

Great Tips for improving your fog photography Splento

How to Capture Breathtaking Photos of Mist and Fog Contrastly

How to Capture Magical Fog Photos on a DSLR Camera Medium

How do you expose correctly for foggy landscapes? LinkedIn

How to Improve Your Fog Photography Iceland Photo Tours

How to Photograph Fog -12 Tips for Mystical Fog Photography Expert Photography

How to Take Photos in Fog, Mist or Haze Cambridge in Colour

Photographing Mist and Fog: 25 atmospheric examples and how to shoot them Canva

See Through the Fog: How to find contrast in foggy conditions Aows

Taking and Processing Fog / Mist Photos PictureCorrect

The Best Guide To Mist And Fog Photography Light Stalking

The Art Of Capturing Winter Fog Photography Mikko Lagerstedt

Tips To Help You Capture Excellent Long Exposure Fog Photos PetaPixel

Woodland Photography in Foggy Conditions PictureCorrect

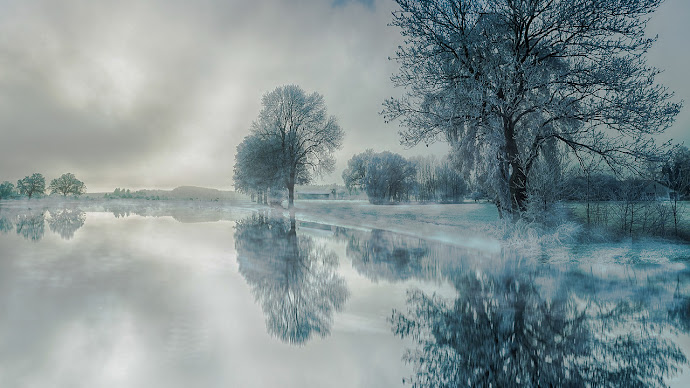
Landscape Photography In The Fog

Top Image Source: Copyright Vernon Chalmers Photography

Bottom Image Source: Pixabay (Open Source)

Using Auto-ISO for Fast Birds in Flight Photography

Canon ISO Settings for Fast  / Small Birds In Flight Photography

Auto ISO Study for Birds in Flight / Fast Action Photography

Record shots: Pied Kingfisher in flight  : Over the Diep River / Woodbridge Island

I am continuously researching the application of Auto-ISO in Birds in Flight photography and would like to share a few images captured with the Canon EOS 70D / EF 70-300mm f/4-5.6L IS USM Lens - demonstrating the modern DSLR's ability for making ISO changes (when Auto-ISO is enabled).

Note: My own field study is based on the relationship between BIF photography (high shutter speed action shooting / continuous AF tracking) and the modern DSLR's Auto-ISO function and will not (necessarily) apply for static subjects (i.e. perched birds) - although, I use the same settings when shooting perched birds (when out doing Birds in Flight photography in good light).

The Canon EOS 70D (APS-C / crop body) is not really recognized as a Canon-recommended high-end body (in the same way as the EOS 7D Mark II (2014) and higher were at the time of Canon's 2013 Auto-ISO publication) for shooting Auto-ISO in Manual and the Semi-Auto Modes (Av = Aperture Priority / Tv = Shutter Priority Modes).

Nevertheless, I went out with the EOS 70D on Auto-ISO for testing / demonstrating the typical enthusiast camera's ability for auto-adjusting ISO's in a low-light and fast-changing background shooting environment.

Auto-ISO is an auto-application that is by far quicker than what I would have achieved with any fix ISO’s when other exposure objectives / settings are (i) a fix Aperture and (ii) a fix Shutter Speed in Manual Mode.

I keep a close eye on about every Auto-ISO reading in the viewfinder before pressing the shutter, but generally it is very effective – or at least acceptable for editing in post-processing later (even in inclement weather and fast-changing backgrounds).

Each of the 4 consecutive frames exposed at different ISO's as the small / erratic bird moved quickly against a lighter to a darker background:

Image 1
 ISO 1000
Image 2 ISO 1600
Image 3 ISO 2000
Image 4 ISO 2500

Canon Gear

  • Canon EOS 70D
  • Canon EF 70-300mm f/4-5.6L IS USM Lens

Exposure Settings

  • Manual Mode
  • Aperture: f/5.6
  • ISO: Auto ISO (1000 - 2500)
  • Shutter Speed:1/5000s

Autofocus (AF) Settings
  • AI Servo
  • Continuous Shooting: 7 fps
  • Zone Selection
  • Handheld

Focal Length
: 300mm

Lightroom 6 Post-Processing
Minimal post-processing (+- 50% crop / slight exposure correction / lens profile correction)

Cape Town Location
Pied Kingfisher at the Pump Station Diep River / Woodbridge Island

Shooting Conditions
Low-light / overcast conditions

Poor light and Canon RF fix / small aperture long lenses may want the developing photographer to experiment more. Using i.e. the Canon RF 600 f/11 IS STM lens  /  Canon RF 800 f/11 IS STM lens in poor light (using Auto-ISO) may render somewhat unacceptable high ISO's for bigger / darker birds (depending on the background). Even with the latest EOS R Full Frame cameras the ISO's may be too high to properly correct in post-processing. Just something to keep in mind. I use a fix ISO for these small aperture lenses (as said example above) - by using a fix ISO 640 the in0flight results were acceptable. For apertures between i.e. f/4 - f/6.3 (whatever the weather) I use Auto-ISO (in Manual Mode - and try and keep (tweak) an average Shutter Speed of between 1/2500 - 1/3200 for fast(er) birds (irrespective of the light). Again: all will depend on body / lens / conditions / subjects.

Findings
A significant finding is the rapid change in ISO 1000 to 2500 (between the 4 continuous frames) as the camera is attempting an ideal exposure.

There are interesting observations (even from the attached record shots why the Auto-ISO moves from ISO 1000 to ISO 2500 in such rapid succession).

Conclusion
From this stage about 8 years ago I always use Auto-ISO for most of my Birds in Flight photography (also reading extensively about the manufacturer's reasoning and motivation for using Auto-ISO for high-speed action such as Birds in Flight). Some of the only exceptions were while testing the fix aperture (f11) Canon RF 600 / RF 800mm lenses in inclement weather (while evaluating the Canon R6 for Canon SA for Birds in Flight photography)

© Vernon Chalmers Photography

Using Auto-ISO for Fast Birds in Flight Photography
"Using Auto-ISO for fast birds in flight photography can be a helpful technique, especially in situations where lighting conditions are changing rapidly, and you want to maintain a fast shutter speed to freeze the motion of the birds. Here are some considerations and tips for using Auto-ISO effectively:

1. Understand Auto-ISO
  •  Auto-ISO allows the camera to automatically adjust the ISO setting based on the available light while keeping the shutter speed and aperture within the specified range.

2. Set Shutter Priority Mode
  • Use Shutter Priority (Tv or S) mode on your camera. This allows you to set the desired shutter speed while the camera adjusts the aperture and ISO automatically.

3. Choose a Fast Shutter Speed
  • Select a fast shutter speed to freeze the motion of fast-flying birds. Shutter speeds of 1/1000 second or faster are often necessary for birds in flight.

 4. Set Minimum Shutter Speed in Auto-ISO Settings
  • Many cameras with Auto-ISO allow you to set a minimum shutter speed. This prevents the ISO from dropping too low and risking motion blur. Set the minimum shutter speed to a value that ensures sharp images.

5. Monitor ISO Range
  • Be aware of the ISO range that your camera is using in Auto-ISO mode. If the ISO goes too high, it can introduce noticeable noise in the images. Find a balance that provides acceptable image quality.

6. Test and Adjust
  • Experiment with different settings in various lighting conditions to see how your camera performs. Adjust the minimum shutter speed and other relevant parameters based on your observations.

7. Use Exposure Compensation
  • In situations where the camera's metering system might be influenced by the background or the bird's coloration, use exposure compensation to adjust the exposure as needed.

8. Shoot in RAW
  • Shooting in RAW format gives you more flexibility in post-processing, allowing you to make adjustments to exposure, noise reduction, and other parameters without compromising image quality.

9. Review Histogram
  • Regularly check the histogram while reviewing your images to ensure that the exposure is well-balanced and that you're not losing details in the highlights or shadows.

10. Consider Manual Mode
  • In situations with consistent lighting, you may opt for Manual mode, setting both aperture and shutter speed manually while adjusting ISO as needed.

11. Focus and Composition
  • Pay attention to autofocus settings and practice tracking fast-moving birds. Additionally, consider the composition and background to create visually appealing images.

Using Auto-ISO in conjunction with Shutter Priority mode can be a powerful tool for capturing birds in flight, allowing you to focus on composition and tracking while the camera adjusts to changing light conditions. Experimentation and familiarity with your camera settings are key to mastering this technique." (Source: ChatGPT 2023)

Auto ISO Study for Birds in Flight Photography
Image 1: ISO 1000 - Auto-ISO for Birds in Flight Photography (Canon EOS 70D)

Auto ISO Study for Birds in Flight Photography
Image: ISO 1600 - Auto-ISO for Birds in Flight Photography (Canon EOS 70D)

Auto ISO Study for Birds in Flight Photography
Image 3: ISO 2000 - Auto-ISO for Birds in Flight Photography (Canon EOS 70D)

Auto ISO Study for Birds in Flight Photography
Image 4: ISO 2500 - Auto-ISO for Birds in Flight Photography (canon EOS 70D)

Low Light / High ISO Shooting Canon EOS 7D Mark II Cape Town View

Birds in Flight Photography Cape Town View

Vernon Chalmers Photography Popular Posts