31 October 2023

History of Milnerton, Cape Town

The old Wooden Bridge (in daily use) - Woodbridge Island  (Circa 1977)

The Wooden Bridge (in daily use) - WoodBridge Island  (Circa 1977)
 From The History of Milnerton by Eric Rosenthal Page 59 (Photo: Johan Du Plessis)

Suburb of Milnerton, Cape Town
The Cape Town suburb of Milnerton was established in 1902 on the site of the old farm, Janbiesjeskraal, and was named in honour of Sir Alfred Milner, Cape Governor 1897-1901. The railway line from Milnerton Junction reached Milnerton on 22 September 1904.
Source: SA History Museum

Exploring Milnerton’s Rich History >> TableTalk

History of Milnerton by Eric Rosenthal (1980)

Free PDF Book Download: History of Milnerton >>

Book / PDF Book Chapters

  • Township in the Wilderness 
  • Wartime Worries 
  • Sales Campaign 
  • The Coming of the Railway 
  • An Old Time Outing 
  • A Rugby 'Ground' and other Schemes 
  • A Racecourse is Born 
  • Travelling Salesmen 
  • Better Times 
  • Shaping a Community 
  • The First World War and After 
  • Housing Schemes 
  • The First Local Board 
  • The 'Winton' 
  • A Leap Forward 
  • Another World War 
  • Chances for Ex-Soldiers 
  • Scheme for a Municipality 
  • The New Town 
  • Municipal Advance 
  • Table View and other Expansion 
  • Residential Growth 
  • Civic Spirit 
  • Black, Brown and White 
  • Planning Ahead 
  • Milnerton – Today 

Published by the Milnerton Municipality

Design and Art Direction Credit: Bob Baker, Cape Town

Colour Photography (Image Credit): Johan du Plessis, Cape Town

Draft Plan (with Images) for The Milnerton Wooden Bridge, Woodbridge Island 2008
The Wooden Bridge (Erf 20315 Milnerton) Heritage Statement & Conservation Management Plan Prepared in Compliance with Section 27 of the National Heritage Resource Act Act (NHTA) June 2008 View Draft Plan >>

Milnerton, Cape Town Historical Society Facebook Group 

Image from The History of Milnerton by Eric Rosenthal (1980)
Historic Milnerton Map

Additional Facts about Milnerton, Cape Town
"Milnerton is a suburb located on the outskirts of Cape Town, South Africa. It is situated along the Atlantic Ocean coastline, approximately 11 kilometers (6.8 miles) north of Cape Town's city centre. Milnerton is known for its beautiful beaches, stunning views of Table Mountain, and its proximity to various attractions.

Some notable features and attractions in Milnerton, Cape Town, include:

1. Milnerton Beach: This expansive sandy beach offers breathtaking views of Table Mountain and is a popular spot for swimming, sunbathing, and beach sports. It is a great place to relax and enjoy the ocean scenery.

2. Milnerton Golf Club: As mentioned earlier, Milnerton Golf Club is one of the oldest golf courses in South Africa. It offers a challenging 18-hole course with stunning views of Table Mountain and the surrounding area.

3. Canal Walk Shopping Centre: Located adjacent to Milnerton, Canal Walk is one of Africa's largest shopping malls. It features a wide range of stores, boutiques, restaurants, and entertainment options, making it a popular destination for shopping and leisure activities.

4. Woodbridge Island: Woodbridge Island is a residential area situated in Milnerton, known for its scenic canals, beachfront homes, and views of Table Mountain. It is a peaceful and picturesque neighborhood worth exploring.

5. Rietvlei Wetland Reserve: Rietvlei is a nature reserve situated in the Milnerton area. It is home to various bird species and offers walking trails, bird hides, and picnic spots for visitors to enjoy the natural surroundings.

6. Milnerton Lighthouse: The iconic Milnerton Lighthouse, located on Woodbridge Island, is a historic landmark that adds to the charm of the area. It has been a navigation aid for ships entering Table Bay since 1960.

Milnerton is well-connected to Cape Town's city centre and other suburbs through major roadways, such as the N1 and N7 highways. It offers a mix of residential areas, commercial establishments, natural beauty, and recreational opportunities, making it an attractive destination for both residents and visitors in Cape Town." (Source: ChatGPT 2023)

Woodbridge Island Bridges View 

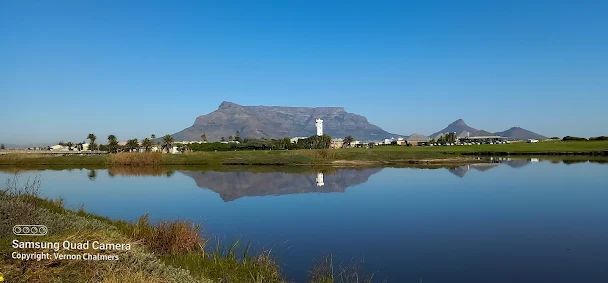
Milnerton Lighthouse Woodbridge Island View 

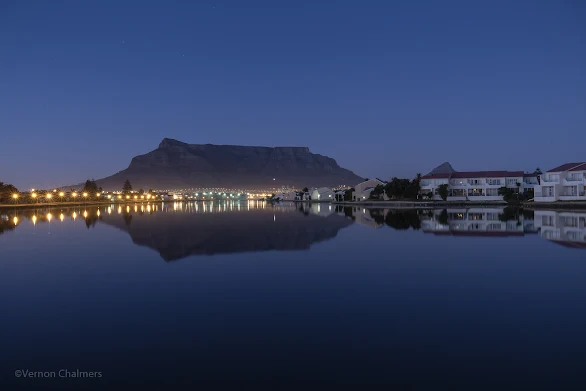
Table Mountain Cape Town From Milnerton View

Poor Water / Sewage Management into the Milnerton Lagoon  / Woodbridge Island View

The Wooden Bridge Today - Woodbridge Island, Milnerton Cape Town (Photo: Vernon Chalmers)
The old Wooden Bridge - Woodbridge Island, Milnerton Cape Town (Photo: Vernon Chalmers)

Canon Photography Training Milnerton Woodbridge Island | Kirstenbosch Cape Town

Canon EOS 7D Mark II: Shooting In The Fog

Shooting in the fog at Woodbridge Island Cape Town with Canon EOS 7D Mark II / EF 400mm f/5.6L USM Telephoto Lens

Canon EOS 7D Mark II: Shooting In The Ffog
Canon EOS 7D Mark II / 400mm Lens

Objective: Shooting in the fog / low light with Canon EOS 7D Mark II in early morning / changing light conditions.

Shooting Conditions: Early morning during / after sunrise with a changing light and and fog in areas. 


Birds In Flight Cape Town Images
All images were captured in Manual Mode / Auto-ISO: Multi-shot / continuous mode at 10 fps AI Servo. Post-processing done with Adobe Lightroom 5.7. RAW to JPG conversion with some sharpening and noise reduction applied.

Birds in Flight Location
Milnerton Lighthouse / Woodbridge Island Cape Town

Canon Gear / Memory Cards

  • Canon EOS 7D Mark II camera body 
  • Canon EF 400mm f/5.6L USM lens
  • Lexar Professional CompactFlash UDMA 7 32 GB
  • Sandisk Extreme Plus SDHC™ UHS-I Card 95MB/s 32 GB

Exposure / Other Settings: Canon EOS 7D Mark II / EF 400mm f/5.6L USM Lens

  • Manual Mode
  • Aperture: f/5.6
  • Auto-ISO 400 - 1600 
  • Focal Length: 400mm 
  • Shutter speed: 1/4000 seconds 
  • AF on - Case 1 / Zone - Wide-Zone
  • Lens Autofocus on
  • Handheld

Tips for Photographing in the Fog >>

Canon EOS 7D Mark II: Shooting In The Ffog
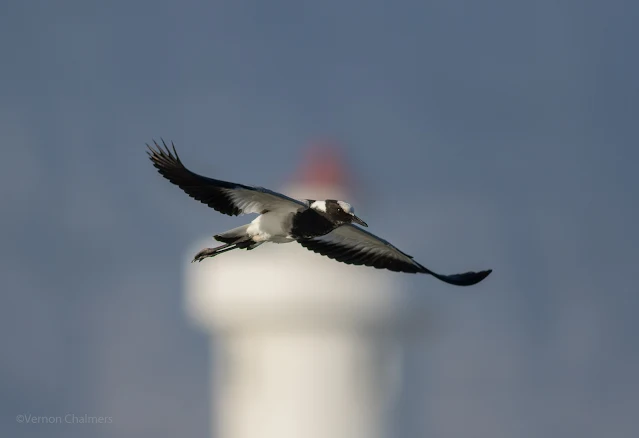
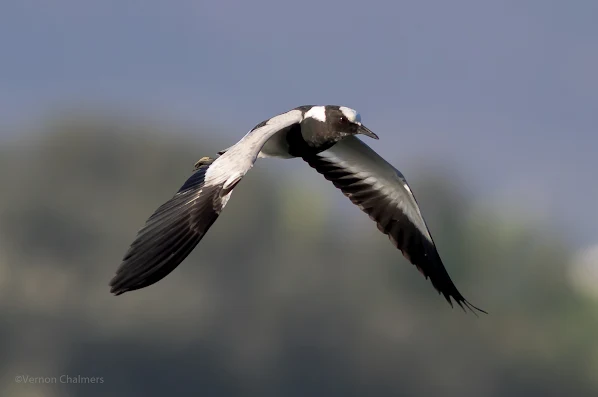
Blacksmith Plover Woodbridge Island - Canon EOS 7D Mark II ISO 400

Canon EOS 7D Mark II: Shooting In The Ffog
Blacksmith Plover Woodbridge Island - Canon EOS 7D Mark II  ISO 400

Canon EOS 7D Mark II: Shooting In The Ffog
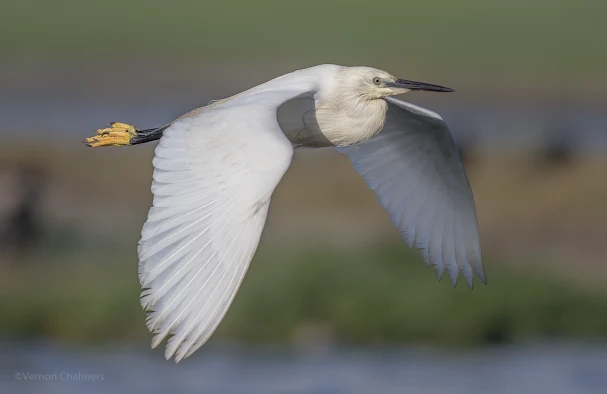
Little Egret Woodbridge Island - Canon EOS 7D Mark II  ISO 400

Canon EOS 7D Mark II: Shooting In The Fog
Egyptian Goose Woodbridge Island - Canon EOS 7D Mark II ISO 640

Canon EOS 7D Mark II: Shooting In The Ffog
Swift Tern Woodbridge Island - Canon EOS 7D Mark II  ISO 1200

Canon EOS 7D Mark II: Shooting In The Ffog
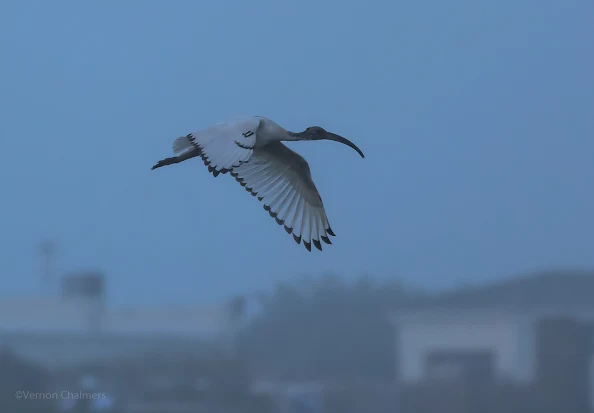
Ibis Woodbridge Island - Canon EOS 7D Mark II  ISO 1600

Canon EOS 7D Mark II - Auto-ISO / Low Light Shooting Cape Town

Canon EOS 7D Mark II - First impressions and Test Shoots Cape Town 

Canon EOS 7D Mark II - Birds in Flight Photo Gallery 

Milnerton Flea Market on a Sunny Saturday

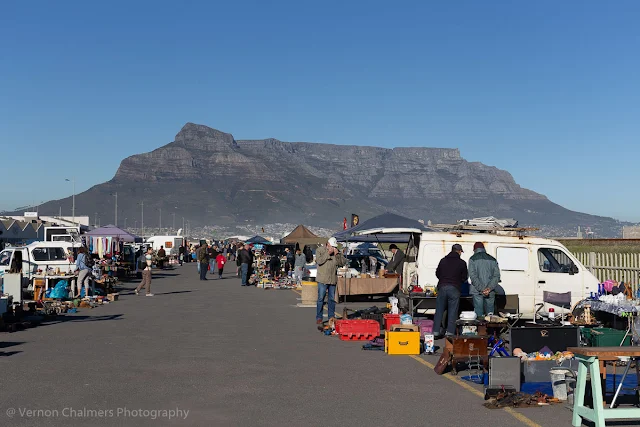
Milnerton Flea Market, Cape Town

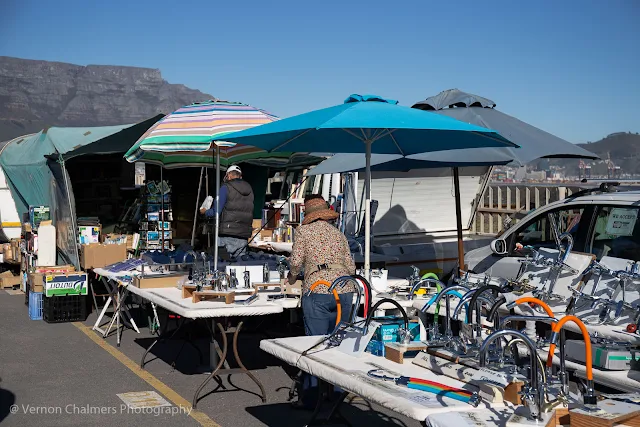
Milnerton Flea Market  - Cameras and Accessories
Milnerton Flea Market  - Cameras and Accessories

Saturday at the Milnerton market...
A hotchpotch of colours, textures, goods and just about everything at the Milnerton Flea Market.

This Flea Market is not just about 'one man's junk is another man's treasure', there are various traders selling handmade African craft works, secondhand books, textile and various stalls of fresh produce and refreshments.

I have found a table with all the old film cameras and accessories particularly interesting and will definitely return for another look.

The Milnerton Flea Market seems to be well organised with clear trading policies and communication between the traders and the Flea Market site management. I've spent some time discussing various bits of trading and other information and received very positive feedback on well organised trading environment and conditions.

Image Gallery
14 images with Canon EOS 6D / EF 24-70mm f/4L IS USM lens.

Av Mode: Auto-ISO / various apertures (f/4-f/11).

All images Copyright Vernon Chalmers Copyright Policy

More About Milnerton Flea Market
"Milnerton Flea Market is a well-known flea market located in Cape Town, South Africa. However, please note that details about specific locations, events, or businesses may change over time. For the most accurate and up-to-date information about the Milnerton Flea Market, I recommend checking local sources, online directories, or contacting local tourism or commerce offices in Cape Town.

Here are some general tips if you're planning to visit a flea market like Milnerton:

1. Operating Days and Hours
Confirm the days and hours of operation for the Milnerton Flea Market. Flea markets often have specific days and times when they are open to the public.

2. Vendor Variety
  • Flea markets typically host a variety of vendors selling a wide range of goods, including clothing, antiques, crafts, collectibles, and more. Be prepared for a diverse shopping experience.

3. Local Cuisine
  • Explore any local food vendors or eateries around the flea market. It's an opportunity to try local cuisine and snacks.

4. Bargaining
  • In many flea markets, bargaining is a common practice. Be prepared to negotiate prices with vendors, but do so respectfully.

5. Local Regulations
  • Be aware of any rules or regulations at the flea market, such as restrictions on photography, payment methods, or specific vendor guidelines.

6. Comfortable Attire
  • Wear comfortable clothing and shoes, as you may be doing a lot of walking and browsing.

7. Local Culture
  • Take the time to interact with local vendors and visitors. Flea markets often provide a glimpse into the local culture and community.

8. Transportation
  • Consider the transportation options available to reach the flea market. If you're using public transport or a taxi, be aware of the nearest drop-off points.

9. Weather Considerations
  • Check the weather forecast and be prepared for the conditions, especially if the flea market is outdoors.

10. Security
  • Keep an eye on your belongings, and be cautious with valuables. It's always a good idea to be aware of your surroundings in crowded places.

To get the most accurate and current information, consider checking online reviews, the official website or social media pages (if available), or contacting the local tourism office in Cape Town." (Souce: ChatGPT 2023)

(Click to Enlarge - Slideshow)
Majestic Table Mountain keeping watch over market trading and proceedings

A truck load full of everything.- from a first old first aid kit to shark teeth
A truck load full of everything.- from a first old first aid kit to shark teeth 

Vibrant and comfy hand painted pillows with boats, cars and flowers

Hand-made leather bags and goods. All produced from factory off-cuts

Books for everybody - from mastering the digital world to freshwater fish species

Something old, something new - busy traders preparing and presenting their goods

Caps for everyone - even supporting the Rugby World Cup 2019


Beautiful textiles from all around the word at sale right here in Milnerton
Beautiful textiles from all around the word at sale right here in Milnerton 

Belts and buckles - handmade by a very proud local leather craftsman


Plastic flowers to decorate and over-loaded table.

More textiles with many colourful patterns

Visitors strolling around the neat rows of traders and their goods

Masterfully crafted authentic African art - dramatic face masks to end the morning

Milnerton Flea Market Website

Address: Marine Drive (R27) opposite Metro Industrial Park, Paarden Eiland Cape Town

Milnerton Flea Market - Map / Directions


African Art & Craft Market - Boulders Beach, Simon's Town View

Photography Training Milnerton | Cape Town

Woodbridge Island | Cape Town Photography

Woodbridge Island / Milnerton Lighthouse Photography

Vernon Chalmers Copyright: Woodbridge Island Photography, Cape Town Milnerton Lighthouse
Milnerton Lighthouse, Woodbridge Island

Woodbridge Island
"Woodbridge Island is a picturesque residential area located in Milnerton, Cape Town, South Africa. Situated on a small island, it offers a unique coastal living experience with stunning views of Table Mountain and the Atlantic Ocean. Here's some more information about Woodbridge Island:

1. Location: Woodbridge Island is located approximately 10 kilometers north of Cape Town's city center, making it easily accessible from the city. It is situated in Milnerton, a coastal suburb known for its beautiful beaches and views.

2. Residential Area: Woodbridge Island is primarily a residential community that features a mix of housing options. There are apartments, townhouses, and some larger luxury homes, making it suitable for various lifestyles and preferences.

3. Security and Amenities: The island is a gated community with 24-hour security, ensuring the safety and peace of mind of its residents. Woodbridge Island offers a range of amenities, including a communal swimming pool, tennis courts, and well-maintained gardens and pathways.

4. Beach and Water Activities: One of the main attractions of Woodbridge Island is its direct access to the beach. Residents can enjoy walks along the sandy shoreline, indulge in water sports like kiteboarding and windsurfing, or simply relax and take in the ocean views.

5. Birdlife and Nature: Woodbridge Island is known for its abundant birdlife, including flamingos, herons, and other water birds. The island's natural surroundings provide opportunities for birdwatching and enjoying the tranquillity of the coastal environment.

6. Views and Photography: With its proximity to the ocean and Table Mountain, Woodbridge Island offers fantastic photography opportunities. The island provides scenic views of the iconic Table Mountain, especially during sunrise and sunset, creating a stunning backdrop for photographers.

7. Nearby Attractions: Woodbridge Island is conveniently located near various attractions and amenities. Milnerton Beach, with its wide sandy stretches, is a popular spot for beachgoers. The nearby Milnerton Golf Course offers opportunities for golf enthusiasts, while the vibrant city center of Cape Town is just a short drive away.

Woodbridge Island is a sought-after residential area that combines coastal living with convenient access to urban amenities. It appeals to those seeking a tranquil and scenic environment while still being close to the vibrant city of Cape Town." (Source: ChatGPT 2023)

About Woodbridge Island Photography
Nature photos from various photographic genres ranging from birds in flight (high-speed action), landscapes / seascapes (wide / ultra-wide) to flowers (macro / wide) will frequently are published here on the Vernon Chalmers Photography website for recording the scenic nature of Woodbridge Island.

Documenting the Woodbridge Island Bird Species
The Woodbridge Island Photography initiative is also used for documenting the various bird species around (perched and in-flight) the Woodbridge Island, Milnerton Lagoon, Diep River and Table Bay Nature Reserve areas.

Up to date I have captured more than 70 bird species in the area - with still a few more to record.

History of Milnerton / Woodbridge Island

History of Milnerton / Woodbridge Island

Bridges of Woodbridge Island, Cape Town

Restoration of the Wooden Bridge, Woodbridge Island
Restoration of the Wooden Bridge Woodbridge Island

Milnerton Lighthouse Views Woodbridge Island, Cape Town

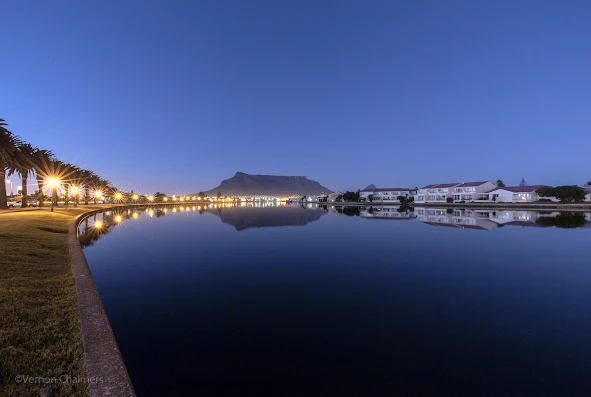
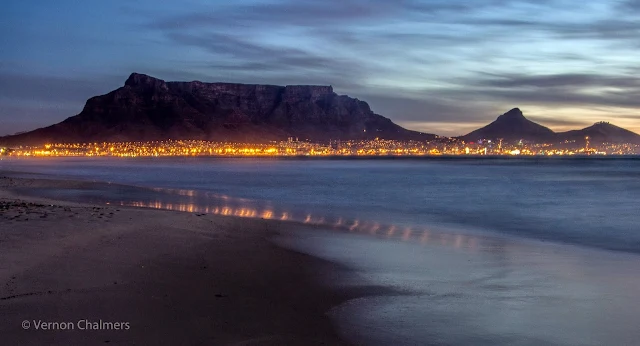
Table Mountain Views From Woodbridge Island, Cape Town
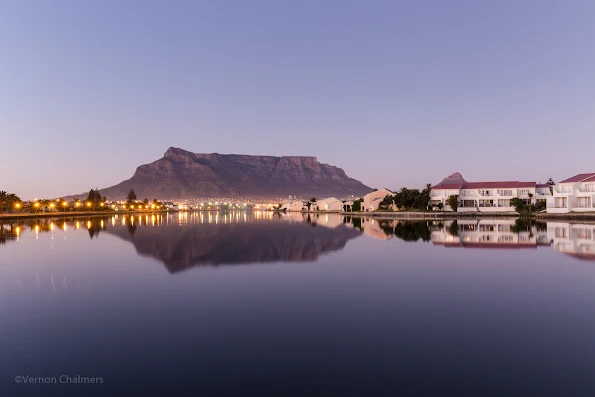
Table Mountain views From Woodbridge Island, Cape Town

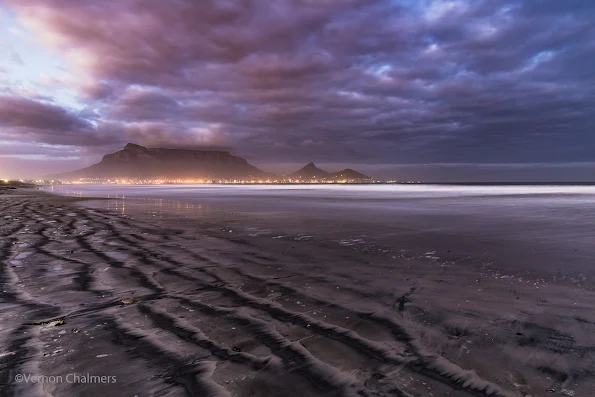
Milnerton Beach Sunset Views Woodbridge Island, Cape Town

Birds in Flight Photography Woodbridge Island, Cape Town

Bird Species Woodbridge Island, Table Bay Nature Reserve

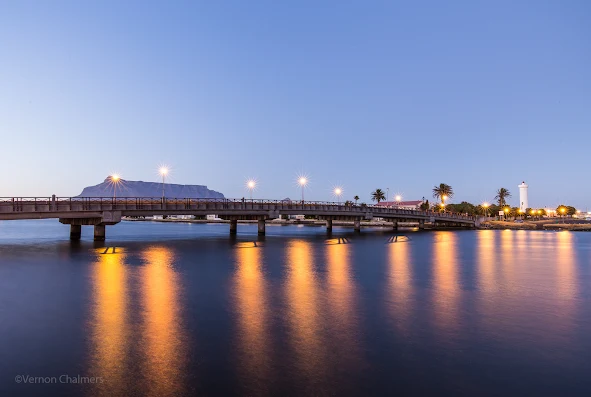
Old Wooden Bridge After Sunset - WoodBridge Island, Cape Town

Copyright Infringement Warning to Cape Town Photographers

Canon Camera / Photography Training Gift Vouchers Available View

Vernon Chalmers Copyright: Woodbridge Island Photography, Cape Town
Please do not use / re-publish any Vernon Chalmers Woodbridge Island, Milnerton Cape Town Photography images without permission. View the Vernon Chalmers Photography Copyright Policy for more more information.

Woodbridge Island, Cape Town

'Woodbridge Island is a picturesque residential area located in Cape Town, South Africa. Situated near Milnerton and surrounded by the beautiful waters of the Milnerton Lagoon and the Atlantic Ocean, Woodbridge Island is renowned for its stunning views and relaxed coastal lifestyle.

The island features a mix of residential properties, including apartments, townhouses, and some luxury homes. Residents enjoy the proximity to the beach, with some properties offering direct access to the sandy shores. The area is also known for its scenic views of Table Mountain and Robben Island.

Woodbridge Island is a popular spot for outdoor activities such as kite surfing, windsurfing, and leisurely walks along the beach. Additionally, the Milnerton Golf Club is nearby, offering a great golfing experience with views of Table Mountain.

With its coastal charm, beautiful scenery, and convenient location not far from Cape Town's city center, Woodbridge Island is an attractive place for residents and visitors seeking a relaxed beachside lifestyle." (Source: Chat CPT 2023)


Sunset Signal Hill Lion's Head over Woodbridge Island Copyright Vernon Chalmers
Sunset: Signal Hill Lion's Head over Woodbridge Island : From Arnhem, Milnerton

Image: Copyright Vernon Chalmers - The Old Wooden Bridge After Sunset: Woodbridge Island, Cape Town
Copyright Vernon Chalmers - The Old Wooden Bridge After Sunset: Woodbridge Island, Cape Town

Image: Copyright Vernon Chalmers - Main Bridge Before  Sunrise: Woodbridge Island, Cape Town
Copyright Vernon Chalmers - Main Bridge Before  Sunrise: Woodbridge Island, Cape Town

Image: Copyright Vernon Chalmers - Woodbridge Island From Arnhem Milnerton, Cape Town

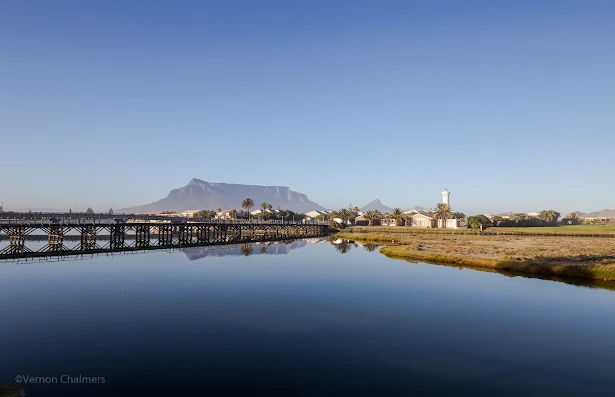
Image: Copyright Vernon Chalmers - Wooden Bridge / Table Mountain: Woodbridge Island, Cape Town
Copyright Vernon Chalmers - Wooden Bridge / Table Mountain: Woodbridge Island, Cape Town


Copyright Vernon Chalmers - Wooden Bridge Woodbridge Island  Cape Town (Before Restoration)
Copyright Vernon Chalmers - Wooden Bridge Woodbridge Island  Cape Town (Before Restoration)

History of Milnerton / Woodbridge Island View

Canon Photography Training Milnerton Woodbridge Island | Kirstenbosch Cape Town

What is Camera / Lens EXIF Data?

What is Camera / Lens EXIF Data?
From Canon's EOS Utility Software
EXIF = Exchangeable Image File Format Information (EXIF Data)

EXIF Data is the identification and listing of information metadata (exposure and other relevant settings) and its values -available for DSLR / Compact / Mirrorless Smartphone cameras before and / or after taking a photo. 

Generally found on your LCD screen viewing image detail or when downloaded in Canon's Digital Photo Professional / Adobe Lightroom (and other camera / editing software).

Basic camera and lens detail such as Camera Make / Model, Lens Type, Exposure, White Balance, File format and various other settings are included in the EXIF Data.

Before / after the shot
The image on the right is a Windows 7 screenshot from a Canon EOS 700D DSLR attached to the EOS Utility (via USB) - before a shot. The Canon camera was set to Av mode with a pre-set f/stop value of F4.5, ISO 200, AF (Auto-Focus), RAW, and Single Shot. The absence of the shutter speed is indicative that when in Av mode, the camera will select the shutter speed during the actual exposure - and will only be available as EXIF Data after the shot.

The bottom image is the EXIF data displayed after the shot settings (extracted from the Canon Digital Photo Professional post-processing software). Notice that the Shutter Speed is now included = (1/45) - The lens information - Canon EF-S 18-135mm IS STM is now also displayed (together with other useful information).

Adobe Lightroom Free Plugin to view Body / Lens EXIF Data

Exposure / EXIF Data
Exposure EXIF information is the result of the Exposure / Lens settings set by the photographer ie. in Manual / Aperture Priority / Shutter Priority / Program Mode the photographer controls exposure settings such as Aperture / ISO / Shutter Speed.

What about EXIF Data in Auto Mode? Although the camera carries out all exposure decisions (except for lens focal length / zoom), all EXIF data will still be recorded and be available after the shot.

Basic camera and exposure info:- Camera / lens type ie. Photo taken with the Canon PowerShot SX60 HS at a focal length of 200mm.
  • Aperture - measuring the size of incoming light areas (f/stop) ie. f/5.6
  • ISO - light or image sensor sensitivity standard) ie ISO 100
  • Shutter speed - (measured in seconds) ie. 3 seconds or 1/1000's

What Is the Purpose of EXIF Data?
EXIF Data assists the photographer with specific exposure (ISO / Aperture / Shutter Speed) and other relevant information at the time of capturing an image. Viewing / comparing EXIF Data is valuable criteria / settings for 'image settings awareness' for learning and or improving similar captures.

Example of EXIF Data: Canon PowerShot SX60 HS
  • Focal Length (FL) 200mm
  • f/5.6 (Aperture)
  • ISO 200 (ISO)
  • 1/250s (Shutter speed)

What is Camera / Lens EXIF Data?

"EXIF (Exchangeable Image File Format) data is a standard for storing metadata in image files captured by digital cameras, scanners, or other imaging devices. It contains a variety of information about the circumstances in which the image was taken, the camera settings, and other technical details related to the image.

Camera and lens EXIF data can include a wide range of information, such as:

1. Camera Make and Model: This identifies the manufacturer and the specific model of the camera used to capture the image.

2. Lens Information: Details about the lens attached to the camera, including the lens make and model, focal length, aperture, and in some cases, even the lens serial number.

3. Exposure Settings: Information about the camera settings at the time the image was taken, such as shutter speed, aperture, ISO sensitivity, exposure compensation, and metering mode.

4. Date and Time: The date and time the image was captured.

5. Geolocation: If the device has GPS capabilities, the EXIF data may contain geographical coordinates, providing the exact location where the image was taken.

6. Camera Settings: Various settings used at the time of image capture, including shooting mode, white balance, focus distance, and more.

7. Image Parameters: Data about the image format, resolution, color space, and other technical aspects of the image file.

This metadata can be viewed using various software or tools that can read and display EXIF information. It's particularly useful for photographers to understand the settings used to capture an image, aiding in analyzing and improving their photography techniques. However, it's also important to note that this data can contain sensitive information, such as geolocation, which might raise privacy concerns when sharing images online. Therefore, it's often recommended to scrub or remove this data when sharing images on the internet." (Source: ChatGPT 2023)

EXIF Data as displayed in the Canon's Digital Photo Professional Post-Processing Software:


Canon EOS 7D Mark II RAW EXIF DATA (After the Exposure / Capture)

EXIF Data as displayed in the Canon's Digital Photo Professional Post-Processing Software (Canon EOS 7D Mark II):
Canon Digital Photo Professional Post-Processing Software Snapshot

More on The Exposure Triangle (Aperture / ISO / Shutter Speed) - Exposure Triangle

Canon Digital Photo Professional 4.10.0 For Windows / Mac -
Download

30 October 2023

Difference between Digital Noise and Background Blur

What is Noise in Photography : Digital Noise versus Background Blur

Difference between Digital Noise and Background Blur

All about the background in the image
Blur can really mean different things in digital photography, but should not to be confused with unwanted graininess or digital noise across a digitally created image. Unwanted noise generally occurs when:
  • shooting in low light, when a digital camera's ISO setting is too high
  • shooting within the digital zoom range of a compact camera 
  • over-cropping an image

Unwanted blur
Out-of-focus blurred area(s) in an image that came about via unintentional camera movement, unwanted subject movement and / or wrong shutter speed settings when photographing movement - something you don't really want.


Deliberate blur
This will appear in areas of the image when the photographer attempts to blur certain areas of a composition / image. With foreground in focus, but the background deliberately blurred depending on the Depth Of Field (DOF) - distance between nearest and farthest object(s) of the composition / framing requirements ie. when isolating a flower from its immediate surroundings.

Deep vs Shallow Depth-Of-Field (DOF)
With a deep DOF more of the entire image will be in focus and its more likely to be used in Landscape Photography with smaller apertures of i.e. f/11 - f16. With shallow DOF specific area(s) of an image is deliberately out of focus and can be applied in a variety of genres (Wildlife / Sport / Macro / Portraits) where the photographer deliberately wants to separate the main subject from the background - for this effect, larger apertures will be applied i,e. f/1.8 - 5.6.

DOF Aperture Test: Canon EOS 6D / EF 50mm f/1.8 STM lens - view>>

DOF flower series demonstration with Canon EOS 700D / EF-S 55-250 IS II lens - view>>

Depth of Field for Beginners: The Essential Guide >>

The visual quality of [deliberate] blur is also referred to as Bokeh
Flower Close-Up Image : Canon 70-300mm Lens (with Extension Tube)

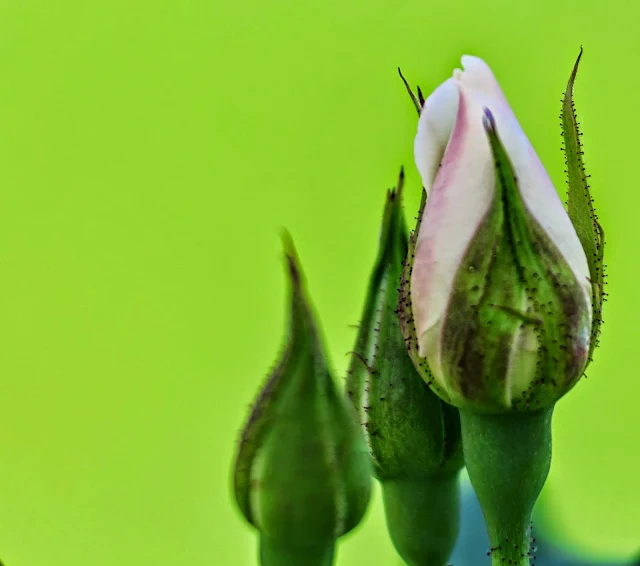
Bokeh: visual quality of the blur...The visual quality of [deliberate] blur is also referred to as Bokeh - Japanese for the out-of-focus aesthetic quality of the deliberate out-of-focus (blurred) area. a Wide aperture of i.e. f/1.8 - f/5.6 or so will be used (depending on the lens / optical distance from subject) to create the required out-of-focus effect.

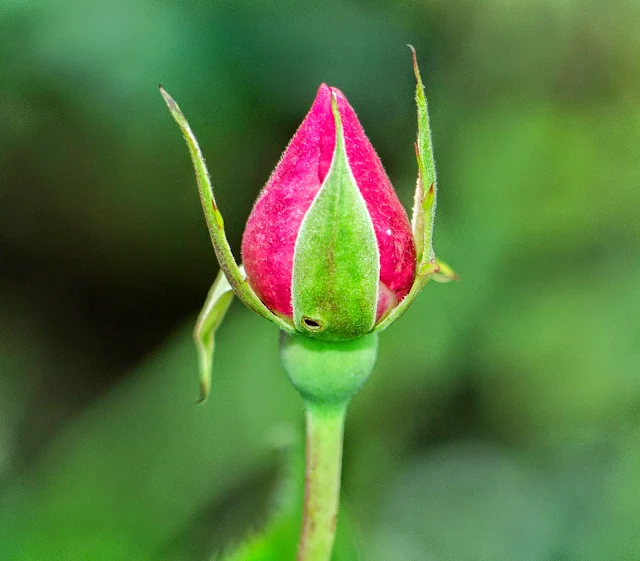
See attached images below: white rose bud, the yellow rose and red rose bud with sharp / in-focus foreground sharp and background deliberately blurred (using wide apertures of f/5.8 and f/5.6). 

Lens apertures
In DSLR photography different lenses are used to create / select different levels of DOF depending on the lens aperture range, optical length of the lens and distance from subject. Different lenses / aperture settings will be applied  for different type of photography genres requiring blur effects at various focal lengths ie. for close-up / macro, portraiture or wildlife photography.  a  DSLR camera system is not necessarily required for creating deliberate image blur, a compact camera with a wide aperture lens with some optical zoom will also work. 

The images below were captured with apertures of f5.6 Yellow Rose (Non-DSLR Canon PowerShot SX40 HS with its f/2.7 - 5.8 35x telephoto zoom lens) and  f/5.6 Red Rose Bud (EOS 700D / EF-S 18-135mm f/3.5 - 5.6 IS STM lens / EF-S 55-250mm f/4 - 5.6 IS II lens).

Canon EOS 6D / EF 70-300mm f/4-5.6L IS USM lens / Extension Tue
Canon 70 / 300mm with Extension Tube 

Which Canon lenses?

Desired Bokeh-effects for close-up or macro flower photography can be achieved with a variety of lenses with wide apertures i.e. with fix aperture lenses such as Canon EF-S 60mm f/2.8 Macro USM or the EF 100mm f2.9 Macro USM prime lenses.

Any Canon DSLR camera body with either an EF or EF-S lens (or other compatible lenses) attached will generate deliberate background / selected blur, but the Bokeh quality will depend on the following factors:

  • Aperture settings (wider is better) 
  • Type of EF / EF-S lens (design and optical length) 
  • Depth of field of objects in the frame 
  • Distance to subject / lighting conditions 
  • Accessories used (extension tubes / close-up filters) 

Different lighting conditions
In all the images the objective was to keep the 'unwanted digital noise' across the frame as low as possible. For the "Yellow Rose' image, shot with Canon PowerShot SX40 HS, I used ISO 100 (in crisp early morning sun light) and the 'Red Rose Bud', shot with the Canon EOS 700D, I used ISO 400 with a Speedlite 430 EX II flash (in early morning overcast / raining conditions).

Canon EOS 6D / Canon EF 50mm f/1.8 STM lens
Flower Image with Canon EOS 6D / 50mm Lens

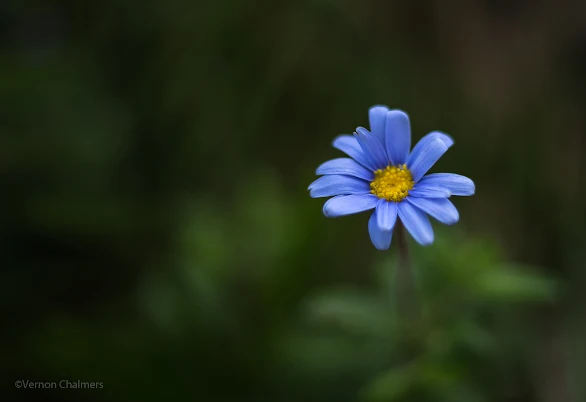
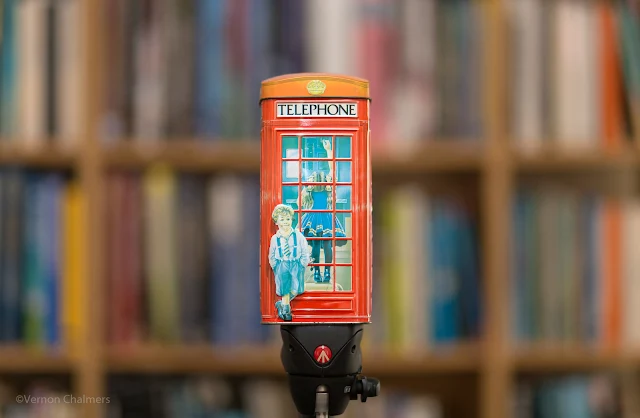
Photographers use blur for various shallow depth-of-field / artistic effects (image on the right - 'blue flower' and first image below - 'red mailbox' with Canon EOS 6D both at an aperture of f/2.8 with Canon EF 50mm f/1.8 STM lens. 


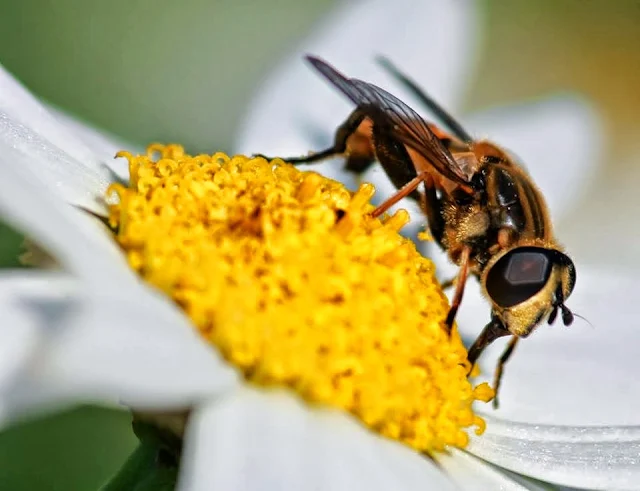
Last image 'bee on flower' was captured with Canon EOS 700D /  55-250mm IS II lens and Canon 500D close-up lens filter), Bee in focus, most of the flower blurred / out of focus, in a deliberate, aperture-controlled and planned way.

Optimal exposure settings
Just to come back to noise - you may have noticed that many of my own photos are not always shot in good lighting conditions. Most of my low light / long exposure DSLR photography shoots are done in Av mode, ISO 100 and apertures between f/16 - f/22 generating automatic shutter speeds of between 1 and 30 seconds.


I often use the camera's Manual shooting mode with similar aperture settings and Bulb Mode - the ability to have manual time control over shutter speeds during every single shot. A time to use this mode is when shooting fireworks. These exposure combinations together with the use of a tripod and RC-6 remote shutter release, almost entirely limits all unwanted  noise / graininess and unwanted blur. © Vernon Chalmers

Difference between Digital Noise and Background Blur

"Digital noise and background blur are two distinct phenomena in photography, often associated with different aspects of image quality and visual aesthetics:

1. Digital Noise
Digital noise refers to the random variations in brightness or color within an image captured by a digital camera, which can give the appearance of grain or speckles. It's particularly noticeable in low-light conditions or when using high ISO settings. It occurs due to the electronic signal amplification necessary to capture images in low-light situations. Higher ISO settings amplify the signal, resulting in a greater presence of noise in the final image. This noise can degrade image quality by reducing sharpness and clarity.

2. Background Blur
 Background blur, often referred to as bokeh, is the aesthetic effect where the background of an image appears out of focus, while the main subject remains in sharp focus. This effect is achieved through a shallow depth of field, typically by using a wide aperture. The result is a pleasing separation between the subject and the background, drawing attention to the main subject by blurring distractions in the background. This technique is commonly used in portrait photography or to isolate a subject in various photographic compositions.

In summary, digital noise is an unwanted interference that can degrade image quality, caused by factors like low light or high ISO settings. In contrast, background blur is an intentional creative technique that enhances the visual appeal of an image by selectively blurring the background to emphasize the subject." (Source: ChatGPT 2023)

(click to enlarge)
Difference between Digital Noise and Background Blur
Canon EOS 6D / EF 50mm f/1.8 STM Lens flash


Difference between Digital Noise and Background Blur
Canon EOS 700D   ISO 100  f/5.6  No Flash


Difference between 'digital noise' and subject / background blur
Canon PowerShot SX40 HS   ISO 100  f/5.8 


Canon EOS 700D ISO 400  f/5.6  Flash  Photo: © Vernon Chalmers
Canon EOS 700D   ISO 400  f/5.6  Flash 


Difference between Digital Noise and Background Blur
Canon EOS 700D   ISO 100  f/5.6  No Flash 


More Depth Of Field (DOF) Examples: DSLR / Non-DSLR / More Bee On Flower with Close-Up Filter

Introduction to the Photography Exposure Triangle

Learning Photography Exposure (For Application in Canon P / Av / Tv / M Modes) 

Introduction to the Exposure Triangle: ISO / Aperture / Shutter Speed
Canon EOS 70D / 300mm Lens ISO 100 f/13 1/125s

Learning Photography Exposure:  ISO / Aperture / Shutter Speed

The objective of this article is to provide new photographers (irrespective of Canon EOS / EOS R / PowerShot camera) with an introduction to the Exposure Triangle and the inter-relationship between the three fundamental exposure elements:
  • ISO
  • Aperture 
  • Shutter Speed 

Camera / Lens EXIF Data
EXIF Data is the identification and listing of an information tag and its value (available for DSLR / Compact / Smartphone cameras after taking the photo) - generally found on your LCD screen viewing image detail or when downloaded in Google Picasa / Adobe Lightroom (and other camera / editing software). Read more>>


Introduction to the Exposure Triangle
Every photo taken with a DSLR / Compact / Smartphone camera will offer / use a variety of settings to expose an image as ideally as possible to the photographer’s vision and planning.

Exposure Triangle for Achieving an 'Ideal Exposure'

Introduction to the Exposure Triangle: ISO / Aperture / Shutter Speed
Exposure Triangle Model Compiled by Vernon Chalmers Photography

Exposure Process
Exposure is a photographic process of light reflecting off a subject through the camera lens onto the camera's image sensor for a specific period of time. The relationship between ISO, Aperture and Shutter Speed settings will determine the final exposure of light (for each image) captured by the camera's image sensor - and will represent a given Exposure Value (EV).

Relationship between ISO, Aperture and Shutter speed
In understanding ISO, Aperture and Shutter Speed it’s important to note that all three are present in every photo you capture with your camera. The degree in which they are applied will depend on various camera and / or lens settings and lighting conditions. The main camera control over the inter-relationship between the three will be decided by the photographer in selecting the most appropriate shooting mode (in Auto Mode the camera will select the exposure settings, with limited other manual / photographic control).

Aperture demonstration for new photographers View

In most cameras today you will not find ISO / Aperture / Shutter Speed settings on the main mode dial of the camera, but either as separate switchgear or tucked inside the menu system – to be used with other settings (when selecting your shooting mode (Auto / P / Av / Tv / M Mode).

Auto-ISO is also an option that many new and experienced photographers are using.


Photographic Genres and the Exposure Triangle
As we developed as photographers we learn how to properly set the exposure for different genres. With Birds in Flight (action) a fast enough shutter speed will be a priority, for a distant landscape the attention / focus will be on a smaller aperture / f/stop. In long exposure / night photography we would like to keep the ISO as low as possible to minimize noise, but may opt for a 30 seconds or longer expose (ito of shutter speed). At all times all three settings of the Exposure Triangle will be configured to assist the photographer with the type of exposure required.

Camera Shooting Modes
In Automatic Mode the camera will decide the exposure settings for the photographer, in the Semi-Automatic Modes (Av / Tv) the camera will decide at least one exposure setting and in Manual Mode the photographer could take full control of all three exposure settings - many photographers who prefer Manual Mode may leave the ISO on Automatic and only set the aperture and the shutter speed.

P Mode Canon PowerShot SX40 HS f/5.6 ISO 100
P Mode: Canon PowerShot SX40 HS f/5.6 ISO 100

All DSLR cameras and the more advanced compact cameras will have at least the following shooting modes in which the ISO / Aperture / Shutter Speed exposure setting will be automatically / manually controlled by camera and / or the photographer.

Auto Mode
In Automatic Mode the camera will decide the best exposure and the photographer will have no control over any ISO / Aperture / Shutter Speed settings. Best use: when new to photography and / or uncertain about setting in changing light conditions.

Program (P) Mode
In P mode the camera will control Aperture and Shutter Speed with the photographer full control over ISO settings. Best use: when new to photography, shooting in changing conditions, but have control over ISO settings. Program (P) Mode demonstration Canon PowerShot SX40 HS

Aperture Priority (Av) Mode
In Av mode the camera will control Shutter Speed with the photographer full control over Aperture and ISO settings.

Best use: when controlling aperture settings for Depth Of Field (DOF) application in ie. macro / landscape / portraiture / street photography. seascapes / Table Mountain photography Canon EOS 6DCanon EOS 700D DSLR


Shutter Priority (Tv) Mode
In Tv mode the camera will control Aperture with the photographer in full control of Shutter Speed and ISO settings.

Best use: when controlling shutter speed for subjects in motion or to freeze motion of birds, people and other objects. Motor Sport / Action photography 
Canon EOS 70D DSLR.

Manual (M) Mode
In M mode the photographer will have full control over ISO, Aperture and Shutter Speed settings.

Best use
: when the photographer requires full manual control over all three settings in specific environments in ie. studio, changing light or other challenging conditions. Birds In Flight photography Canon EOS 7D Mark II

Introduction to the Photography Exposure Triangle

"The photography exposure triangle is a fundamental concept that explains the relationship between three critical elements in photography: aperture, shutter speed, and ISO (International Standards Organization). These three components collectively determine the exposure, brightness, and overall look of a photograph.

1. Aperture: This refers to the size of the opening in the lens when a picture is taken. It's measured in f-stops (e.g., f/2.8, f/5.6, etc.). A lower f-stop number means a larger aperture, allowing more light to reach the camera sensor. Aperture not only controls the amount of light but also affects depth of field. A wider aperture (smaller f-stop number) results in a shallower depth of field, making the background more blurred, ideal for portraits. A narrower aperture (larger f-stop number) increases depth of field, keeping more of the image in focus, commonly used in landscape photography.

2. Shutter Speed: This determines the length of time the camera's shutter remains open to let light in. Shutter speed is measured in seconds or fractions of a second (e.g., 1/1000, 1/250, 1", etc.). A faster shutter speed (1/500 or higher) freezes motion, suitable for sports or fast-moving subjects. Conversely, a slower shutter speed (1/30 or slower) allows more light and creates motion blur, ideal for artistic shots of moving objects or low-light conditions. 

3. ISO: This represents the sensor's sensitivity to light. A lower ISO number (e.g., ISO 100) means the sensor is less sensitive to light but produces finer grain in the image. Higher ISO settings (e.g., ISO 800, ISO 1600, etc.) make the sensor more light-sensitive but might introduce more digital noise or grain in the image. It's crucial to balance the ISO setting based on the available light conditions.

The exposure triangle involves a delicate balance between these three elements. Adjusting one parameter affects the others and the overall exposure of the image. For instance, if you increase the aperture size (wider opening), you may need to compensate by either increasing the shutter speed or lowering the ISO to maintain a balanced exposure.

Mastering the exposure triangle is crucial in photography as it allows photographers to achieve the desired creative effect and properly expose their images in various lighting conditions. Understanding how these settings interact enables photographers to make informed decisions to capture the perfect shot." (Source: Chat GPT 2023)

Example Image: Inter-relationship of ISO, Aperture and Shutter Speed

Image 1 : Canon EOS 7D Mark II  / 400mm lens Av Mode f/5.6

More of this Shoot  World of Birds Hout Bay Cape Town

S
hooting mode: Av (Aperture Priority) with the following EXIF data: 
  • ISO 640 – (Auto-ISO - controlled by Camera
  • f/5.6 - (aperture – controlled by photographer)
  • 1/90s - (shutter speed – controlled by camera)

Interpretation and interaction of these exposure EXIF data readings:


P Mode: EOS 700D / 10-18mm Lens IS0 800 f/4.5

ISO
ISO is the abbreviation for International Standards Organisation and an indicator of the sensitivity of light entering the lens onto the sensor. Its measured in values of ISO 50, 100, 200, 400, 800, 1600, 3200, 6400 and 12 800. Most cameras will also have an option for Auto-ISO. More advanced / professional digital cameras could have and ISO of up to ISO 51200+ (ie. Canon EOS 1D X). Most cameras including compact cameras will give an ISO range of 100 – 6400+ which is suitable for most lighting conditions.

ISO 100 is generally the setting used for outside / bright light photography and will be set higher as outside natural light or internal artificial light deteriorates. Not uncommon to set ISO 400 for indoor lighting and up to ISO 1600 for outside / low light photography. These various ISO settings are available for the photographer to adjust
for low light photography – even to leave the camera on Auto-ISO (for changing daylight / overcast conditions). It is recommended to experiment with ISO 400 - 1600 for after dark / night photography. When doing long exposures (slow shutter speeds) it is recommended to use ISO 100 - 400. Higher ISO demonstration Canon EOS 700D DSLR

Recommended ISO settings:

  • ISO 100 or 200 for sunny and bright daylight 
  • ISO 400 ISO for cloudy days, or indoors 
  • ISO 800 for indoors (without a flash) 
  • ISO 1600+ for very low light situations 

Disadvantages of high ISO settings:

  • More noise visible in the image the higher the ISO value
  • Higher ISO’s affects slower shutter speeds (for possible camera shake if handheld)

Thoughts on Atmospheric Conditions for Photographers
Image 2 - Av Mode: f/5.6 ISO 400 1/90s

Aperture
Aperture is the size of the space in which light enters the lens / camera. It is measured in f/stops - a fractional formula used for allowing a certain amount of light in - ie. f/5.6 or f/11 which is controlled by the photographer via a variety of ways ie. manually doing it in Av or Manual mode on the camera body). In Auto or P mode (and Tv Mode) the camera will decide the aperture for you). Aperture is (also) used to control Depth Of Field DOF). DOF / close-up photography in Av mode 
Aperture values

f/1.8  f/2.8  f/4  f5.6  f/8  f/16  f/19  f/22 f/32 (This is lens 
dependent on a DSLR camera system, but in most cameras the setting will be on camera body). 


Image 2 EXIF Data: Av Mode

ISO 400 (low light)

f/5.6 (wide aperture for shallow Depth-Of-Field)

Shutter Sped 1/90 seconds

Deep vs; Shallow Depth-Of-Field (DOF) 
With a deep DOF more of the entire image will be in focus and its more likely to be used in Landscape Photography with smaller apertures of ie. f/11 – f/16. With shallow DOF certain areas of an image is deliberately out of focus and be used in a variety of genres (Wildlife / Sport / Macro / Portraits) where the photographer deliberately wants to separate the main subject from the
background - for this effect, larger apertures will be applied ie. f/1.4 - f/8 (see below image)


Lens Apertures f/2 - f/22


Introduction to the Exposure Triangle: ISO / Aperture / Shutter Speed

Aperture Demo: Canon EOS 6D / EF 85mm f/1.8 USM Lens f/1.8 - f/22  View 


Lens apertures In DSLR photography different lenses are used to create / select different levels of DOF depending on the lens aperture range, optical length of the lens and distance from subject. Different lenses / aperture settings will be applied for different type of photography genres requiring blur effects at various focal lengths ie. for close-up / macro, portraiture or wildlife photography. A DSLR camera system is not necessarily required for creating deliberate image blur, a compact camera with a wide aperture lens with some optical zoom will also work to some extent.

See Aperture / DOF Demonstration Aperture / DOF Demo

Aperture is used to control the exposure of a deep or a shallow Depth Of field (DOF) for a specific composition. A smaller f/number allows more light into the camera via the lens ie. f/2.8-f/5.6 and will create a shallow DOF for a close-up subject against a background (isolating a flower from its surroundings). See article Digital Noise vs Blur

Introduction to the Exposure Triangle: ISO / Aperture / Shutter Speed
Image 3: Canon EOS 7D Mark II  : 1/3200s Manual Mode
Shutter Speed
Shutter speed is the length of time the camera's shutter is open (and closing) allowing light onto the sensor for a given time period. Shutter speed is always measured in time. Measured in fractions of a second ie.1/125 seconds, but can extend past 30 seconds up to hours. Most digital cameras will have a default range from 1/4000 – 30 seconds. But can be faster up to 1/8000 depending on the DSLR model.

Slow shutter speed
Refer to the article ‘Long Exposures / Night Photography Setup & Tips
(Using Av mode) 
long exposure demo for specific
examples to learn more about specific shutter speeds.

Fast shutter speed
To freeze motion photographers use fast shutter speeds to ie freeze the wings
of a bird in motion. See Image 3 
for the example
in which I captured the Bird In Flight (Image 3) at a shutter speed of 1/3200 seconds using Manual Mode: f/6.3  ISO 500 (Auto- ISO).

Suggested Shutter Speeds

To Capture Motion
  • Moving water / waterfalls 4+ seconds
  • Fireworks 4+ seconds
  • Moving car at night 8+ seconds
  • Night photography 1+ seconds

To Freeze Action
  • Birds in flight 1/1000+
    seconds
  • Moving water / waterfalls
    1/1000+ seconds
  • Cars / motorcycles 1/1000 seconds
  • Sporting event 1/500 –
    1/2000 seconds

Canon  EOS 700D / 100mm Lens f/11 ISO 200 1/125s

Conclusion
The ‘Exposure Triangle’ settings will be available before every photograph is captured. For the new photographer Auto-mode and / or semi-auto modes such as P / Av / Tv modes will provide assistance in getting the best exposure for a given shooting environment.

New photographers should be in no rush to ‘have to’ understand all exposure settings and shootings modes as soon as possible. Learning about them is important, but more important is getting comfortable with your camera, menu settings and your compositions.

Photography is a visually inspiring journey that if allowed, will not just develop camera / photographic skills or exploring different environments, but contribute to an overall mindfulness and satisfaction of great image capturing (and sharing).


Canon Camera Equipment Used (for example images)
  • Canon EOS 6D DSLR Camera body
  • Canon EOS 7D Mark II Camera body
  • Canon EOS 70D DSLR Camera body 
  • Canon EOS 700D DSLR Camera body 
  • Canon EF-S 10-18mm f/4.5-5.6 IS STM lens 
  • Canon EF-S 18-135mm f/3.5-5.6 IS STM lens 
  • Canon EF-S 55-250mm f/4-5.6 IS II lens 
  • Canon EF 50mm f/1.8 STM lens
  • Canon EF 70-300mm f/4-5.6 IS USM lens 
  • Canon EF 24-70mm f4L IS USM lens
  • Canon EF 70-300mm f/4-5.6L IS USM lens
  • Canon EF 100mm f/2.8 Macro USM lens 
  • Canon EF 400mm f/5.6L USM Telephoto / Prime lens 
  • Canon EF 100-400mm f/4.5 - 5.6L IS II USM Zoom lens
  • Canon Speedlite 430EX II external hotshoe flash 

Cape Town Shooting Locations
  • Birds in Flight: Woodbridge Island Cape Town
  • Fashion: Partners Hair Design Kenilworth Cape Town
  • Fireworks / Ferris Wheel: V&A Waterfront Cape Town
  • Flowers: Arnhem Milnerton Cape Town
  • Flowers Aurora Durbanville Cape Town
  • Motor Racing Killarney Cape Town
  • Perched Bird: Blouberg Strand Cape Town
  • Perched Bird: World of Birds Hout Bay Cape Town

All Text / Images / Partners Hair Model © Vernon Chalmers 2013 - 2017


(Click to Enlarge)
Canon EOS 70D / EF 85mm f/1.8 USM Lens f/4 ISO 1600


Introduction to the Exposure Triangle: ISO / Aperture / Shutter Speed
Canon EOS 6D / 70-300mm Lens Av Mode: ISO 320  f/10  1/320s

Introduction to the Exposure Triangle: ISO / Aperture / Shutter Speed
Canon EOS 70D / 400mm Lens Manual Mode: ISO 320  f/6.3  1/2000s

Introduction to the Exposure Triangle: ISO / Aperture / Shutter Speed
Canon EOS 6D / 24-70mm Lens Av Mode: ISO 100  f/16  15s

Fireworks Canon EOS 700D ISO 100  f/11 8s
Fireworks Canon EOS 700D ISO 100  f/11  8s

Introduction to the Exposure Triangle: ISO / Aperture / Shutter Speed
Canon  EOS 70D / 100mm Lens f/2.8 ISO 5000 1/110s

Introduction to the Exposure Triangle: ISO / Aperture / Shutter Speed
Canon EOS 70D / EF 70-300mm f/4-5.6L IS USM Lens f/11 1/160s

Canon Long Exposure / Night Photography Setup & Tips View

Vernon Chalmers Photography Popular Posts