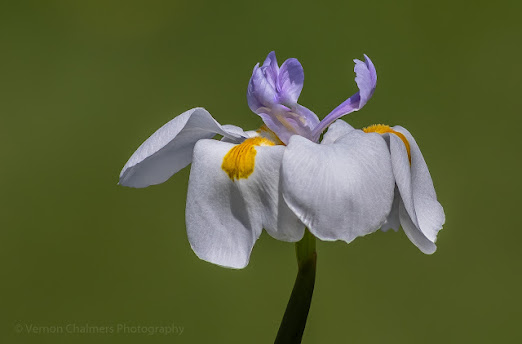
Vernon Chalmers Perched Bird and Flower Photography Training
 |
| Perched Bird Photography Training : Kirstenbosch Garden, Cape Town |
How to do Perched Bird and Flower Photography
Perched bird and flower photography can be a rewarding and enjoyable genre of photography. Capturing these subjects in their natural environment requires patience, observation, and some technical skills. Here are some steps to help you get started:
1. Equipment:
- Camera: Use a DSLR or a mirrorless camera with manual control settings. This will allow you to have full control over the exposure, focus, and other important settings.
- Lens: Invest in a telephoto lens with a focal length of at least 200mm or more. This will enable you to capture birds and flowers from a distance without disturbing them.
- Tripod: A sturdy tripod is essential for stability, especially when using longer focal lengths. It helps reduce camera shake and allows you to compose your shots more precisely.
2. Research and Observation:
- Study the behaviour of the birds and flowers you want to photograph. Learn about their habitats, feeding patterns, and typical perching spots. This knowledge will help you predict their movements and find suitable locations for photography.
- Spend time observing the birds and flowers in their natural environment. Take note of their preferred perches, the lighting conditions at different times of the day, and any specific behaviours or interactions you may observe.
3. Location and Composition:
- Find a suitable location where you are likely to find perched birds and flowers. This could be a park, nature reserve, botanical garden, or any area with diverse flora and fauna.
- Consider the composition of your shots. Look for interesting backgrounds, such as colourful flowers, foliage, or natural elements that complement your subject. Experiment with different angles and perspectives to create visually appealing compositions.
4. Lighting:
- Pay attention to lighting conditions. Soft, diffused light is often ideal for bird and flower photography as it brings out details and colours without harsh shadows. Early morning or late afternoon light, known as the golden hour, can provide a warm and flattering glow.
- Avoid shooting in harsh midday sunlight, as it can create high contrast and unflattering shadows. If you have no choice but to shoot in bright light, consider using a diffuser or finding shaded areas to soften the light.
5. Camera Settings:
- Set your camera to manual mode to have full control over the exposure. Adjust the aperture to control the depth of field, allowing you to isolate the subject from the background.
- Use a fast shutter speed to freeze any movement of the birds or flowers. Start with a shutter speed of at least 1/500th of a second and adjust as needed.
- Use a low ISO setting to minimize noise and ensure optimal image quality.
- Consider using a wide aperture (small f-number) to achieve a shallow depth of field, which can help blur the background and make your subject stand out.
6. Patience and Quiet:
- Patience is key in perched bird and flower photography. Stay still and quiet in your chosen location, allowing the birds and flowers to become comfortable with your presence.
- Avoid sudden movements or loud noises that might startle or disturb your subjects. Remember that their well-being should always come first.
- 7. Post-Processing:
Once you have captured your images, post-processing can enhance their visual impact. Use photo editing software like Adobe Lightroom or Photoshop to adjust exposure, color balance, sharpness, and other elements as needed. However, aim to keep your post-processing natural and faithful to the original scene.
Remember, perched bird and flower photography requires practice and persistence. Enjoy the process of observing nature and capturing its beauty through your lens." (Source: ChatGPT 2023)
Bird and Flower Photography Training, Cape Town >>
 |
| Small Flower Photography Training : Woodbridge Island, Cape Town |
Vernon Chalmers Photography Training Intaka Island | Kirstenbosch Garden | Woodbridge Island