Canon ISO Settings for Fast / Small Birds In Flight Photography
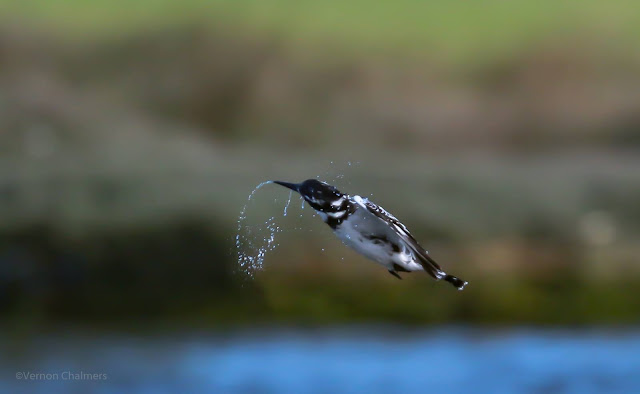
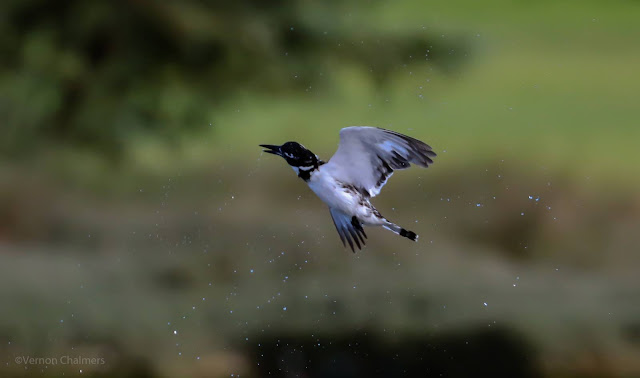
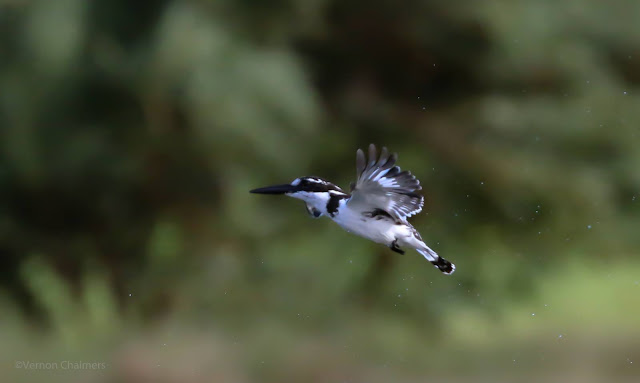
Record shots: Pied Kingfisher in flight : Over the Diep River / Woodbridge Island
I am continuously researching the application of Auto-ISO in Birds in Flight photography and would like to share a few images captured with the Canon EOS 70D / EF 70-300mm f/4-5.6L IS USM Lens - demonstrating the modern DSLR's ability for making ISO changes (when Auto-ISO is enabled).
Note: My own field study is based on the relationship between BIF photography (high shutter speed action shooting / continuous AF tracking) and the modern DSLR's Auto-ISO function and will not (necessarily) apply for static subjects (i.e. perched birds) - although, I use the same settings when shooting perched birds (when out doing Birds in Flight photography in good light).
The Canon EOS 70D (APS-C / crop body) is not really recognized as a Canon-recommended high-end body (in the same way as the EOS 7D Mark II (2014) and higher were at the time of Canon's 2013 Auto-ISO publication) for shooting Auto-ISO in Manual and the Semi-Auto Modes (Av = Aperture Priority / Tv = Shutter Priority Modes).
Nevertheless, I went out with the EOS 70D on Auto-ISO for testing / demonstrating the typical enthusiast camera's ability for auto-adjusting ISO's in a low-light and fast-changing background shooting environment.
Auto-ISO is an auto-application that is by far quicker than what I would have achieved with any fix ISO’s when other exposure objectives / settings are (i) a fix Aperture and (ii) a fix Shutter Speed in Manual Mode.
I keep a close eye on about every Auto-ISO reading in the viewfinder before pressing the shutter, but generally it is very effective – or at least acceptable for editing in post-processing later (even in inclement weather and fast-changing backgrounds).
Each of the 4 consecutive frames exposed at different ISO's as the small / erratic bird moved quickly against a lighter to a darker background:
Image 1 ISO 1000
Image 2 ISO 1600
Image 3 ISO 2000
Image 4 ISO 2500
Canon Gear
- Canon EOS 70D
- Canon EF 70-300mm f/4-5.6L IS USM Lens
Exposure Settings
- Manual Mode
- Aperture: f/5.6
- ISO: Auto ISO (1000 - 2500)
- Shutter Speed:1/5000s
Autofocus (AF) Settings
- AI Servo
- Continuous Shooting: 7 fps
- Zone Selection
- Handheld
Focal Length: 300mm
Lightroom 6 Post-Processing
Minimal post-processing (+- 50% crop / slight exposure correction / lens profile correction)
Cape Town Location
Pied Kingfisher at the Pump Station Diep River / Woodbridge Island
Shooting Conditions
Low-light / overcast conditions
Poor light and Canon RF fix / small aperture long lenses may want the developing photographer to experiment more. Using i.e. the Canon RF 600 f/11 IS STM lens / Canon RF 800 f/11 IS STM lens in poor light (using Auto-ISO) may render somewhat unacceptable high ISO's for bigger / darker birds (depending on the background). Even with the latest EOS R Full Frame cameras the ISO's may be too high to properly correct in post-processing. Just something to keep in mind. I use a fix ISO for these small aperture lenses (as said example above) - by using a fix ISO 640 the in0flight results were acceptable. For apertures between i.e. f/4 - f/6.3 (whatever the weather) I use Auto-ISO (in Manual Mode - and try and keep (tweak) an average Shutter Speed of between 1/2500 - 1/3200 for fast(er) birds (irrespective of the light). Again: all will depend on body / lens / conditions / subjects.
Findings
A significant finding is the rapid change in ISO 1000 to 2500 (between the 4 continuous frames) as the camera is attempting an ideal exposure.
Conclusion
From this stage about 8 years ago I always use Auto-ISO for most of my Birds in Flight photography (also reading extensively about the manufacturer's reasoning and motivation for using Auto-ISO for high-speed action such as Birds in Flight). Some of the only exceptions were while testing the fix aperture (f11) Canon RF 600 / RF 800mm lenses in inclement weather (while evaluating the Canon R6 for Canon SA for Birds in Flight photography)
© Vernon Chalmers Photography
Using Auto-ISO for Fast Birds in Flight Photography
"Using Auto-ISO for fast birds in flight photography can be a helpful technique, especially in situations where lighting conditions are changing rapidly, and you want to maintain a fast shutter speed to freeze the motion of the birds. Here are some considerations and tips for using Auto-ISO effectively:
1. Understand Auto-ISO
- Auto-ISO allows the camera to automatically adjust the ISO setting based on the available light while keeping the shutter speed and aperture within the specified range.
2. Set Shutter Priority Mode
- Use Shutter Priority (Tv or S) mode on your camera. This allows you to set the desired shutter speed while the camera adjusts the aperture and ISO automatically.
3. Choose a Fast Shutter Speed
- Select a fast shutter speed to freeze the motion of fast-flying birds. Shutter speeds of 1/1000 second or faster are often necessary for birds in flight.
4. Set Minimum Shutter Speed in Auto-ISO Settings
- Many cameras with Auto-ISO allow you to set a minimum shutter speed. This prevents the ISO from dropping too low and risking motion blur. Set the minimum shutter speed to a value that ensures sharp images.
5. Monitor ISO Range
- Be aware of the ISO range that your camera is using in Auto-ISO mode. If the ISO goes too high, it can introduce noticeable noise in the images. Find a balance that provides acceptable image quality.
6. Test and Adjust
- Experiment with different settings in various lighting conditions to see how your camera performs. Adjust the minimum shutter speed and other relevant parameters based on your observations.
7. Use Exposure Compensation
- In situations where the camera's metering system might be influenced by the background or the bird's coloration, use exposure compensation to adjust the exposure as needed.
8. Shoot in RAW
- Shooting in RAW format gives you more flexibility in post-processing, allowing you to make adjustments to exposure, noise reduction, and other parameters without compromising image quality.
9. Review Histogram
- Regularly check the histogram while reviewing your images to ensure that the exposure is well-balanced and that you're not losing details in the highlights or shadows.
10. Consider Manual Mode
- In situations with consistent lighting, you may opt for Manual mode, setting both aperture and shutter speed manually while adjusting ISO as needed.
11. Focus and Composition
- Pay attention to autofocus settings and practice tracking fast-moving birds. Additionally, consider the composition and background to create visually appealing images.
Using Auto-ISO in conjunction with Shutter Priority mode can be a powerful tool for capturing birds in flight, allowing you to focus on composition and tracking while the camera adjusts to changing light conditions. Experimentation and familiarity with your camera settings are key to mastering this technique." (Source: ChatGPT 2023)
 |
| Image 1: ISO 1000 - Auto-ISO for Birds in Flight Photography (Canon EOS 70D) |
 |
| Image: ISO 1600 - Auto-ISO for Birds in Flight Photography (Canon EOS 70D) |
 |
| Image 3: ISO 2000 - Auto-ISO for Birds in Flight Photography (Canon EOS 70D) |
 |
| Image 4: ISO 2500 - Auto-ISO for Birds in Flight Photography (canon EOS 70D) |
Low Light / High ISO Shooting Canon EOS 7D Mark II Cape Town View
Birds in Flight Photography Cape Town View
Birds in Flight Photography Cape Town View
